How to Create reCAPTCHA V2 With Google Captcha and React
Posted August 23, 2023

CAPTCHA (Completely Automated Public) is a challenge-response test used to determine whether or not a user is human or a bot. CAPTCHAs are used as a security measure to prevent computer-generated bots from engaging your application. Examples of CAPTCHAs include images with distorted text, audio recordings of words, and mathematical equations.
reCAPTCHA allows you to protect websites from spam and abuse. It uses risk analysis techniques to distinguish between humans and computer bots. This allows you to ensure only the human users are allowed to interact with some components of your application, such as submitting forms and user authentications.
Implementing reCAPTCHA in your websites allows you to prevent spam and bots from accessing your application. The most common forms of CAPTCHAs are image-based and reCAPTCHA v2, v3. In this article, you will implement Google reCAPTCHA V2 on a React.js application.
Prerequisites
To continue in this article, it is helpful to have the following:
Setting Up The Application
Proceed to the preferred working directory. Run the following command from the terminal of your text editor to bootstrap a start yuor React application:
npx create-react-app react-recaptcha
After the installation is done, proceed to the newly created directory:
cd react-recaptcha
Install the reaptcha package we will use for integrating Google ReCaptcha with the application. Use the following command:
npm i reaptcha
- Now you can go ahead and start the development environment to test the application:
npm run start
Setting Up The ReCaptcha Form Component
Navigate to your application src/App.js file and edit it as follows, step by step:
- Import the necessary packages:
import { useState, useRef } from "react";
- Set up the state for
first_name, last_name, error, and message.
const [first_name, setFirstName] = useState("");

const [last_name, setLastName] = useState("");

const [message, setMessage] = useState("");

const [error, setError] = useState("");
- Set up an submit form handler function:
const handleSubmit = (e) => {
  e.preventDefault();

  setError("");

  setMessage("");

  if (first_name && last_name) {
    setMessage("Hurray!! you have submitted the form");
  } else {
    setError("First name and Last name are required");
  }
};
From above, we are checking if the user has entered a first name and a last name.
- Render the form fields in the render function:
return (
  <div className="App">
    {error && <p className="textError">Error!! {error}</p>}

    {message && <p className="textSuccess">Success!! {message}</p>}

    <form onSubmit={handleSubmit} className="formContainer">
      <div className="formGroup">
        <label>First Name</label>

        <input
          type="text"
          name="first_name"
          placeholder="Enter your first name"
          onChange={(e) => setFirstName(e.target.value)}
        />
      </div>

      <div className="formGroup">
        <label>Last Name</label>

        <input
          type="text"
          name="last_name"
          placeholder="Enter your last name"
          onChange={(e) => setLastName(e.target.value)}
        />
      </div>

      <div className="formGroup">
        <button type="submit">Submit</button>
      </div>
    </form>
  </div>
);
This will render a form that we will use to check if the user interacting with it is a human or a bot.
Setting Up the Form Styles
Edit the src/App.css as below to style the newly added form fields:
.App {
  width: 40%;

  margin: 10px auto;
}

.formContainer {
  width: 100%;

  margin-top: 10px;

  border: 1px solid #d4d4d4;

  padding: 10px;
}

.formGroup {
  width: 100%;

  margin-bottom: 10px;
}

.formGroup label {
  width: 100%;

  display: block;

  margin-bottom: 10px;
}

.formGroup input[type="text"] {
  width: 95%;

  padding: 10px;
}

.formGroup input[type="password"] {
  width: 95%;

  padding: 10px;
}

.textSuccess {
  color: green;
}

.textError {
  color: red;
}
Setting Up Recaptcha
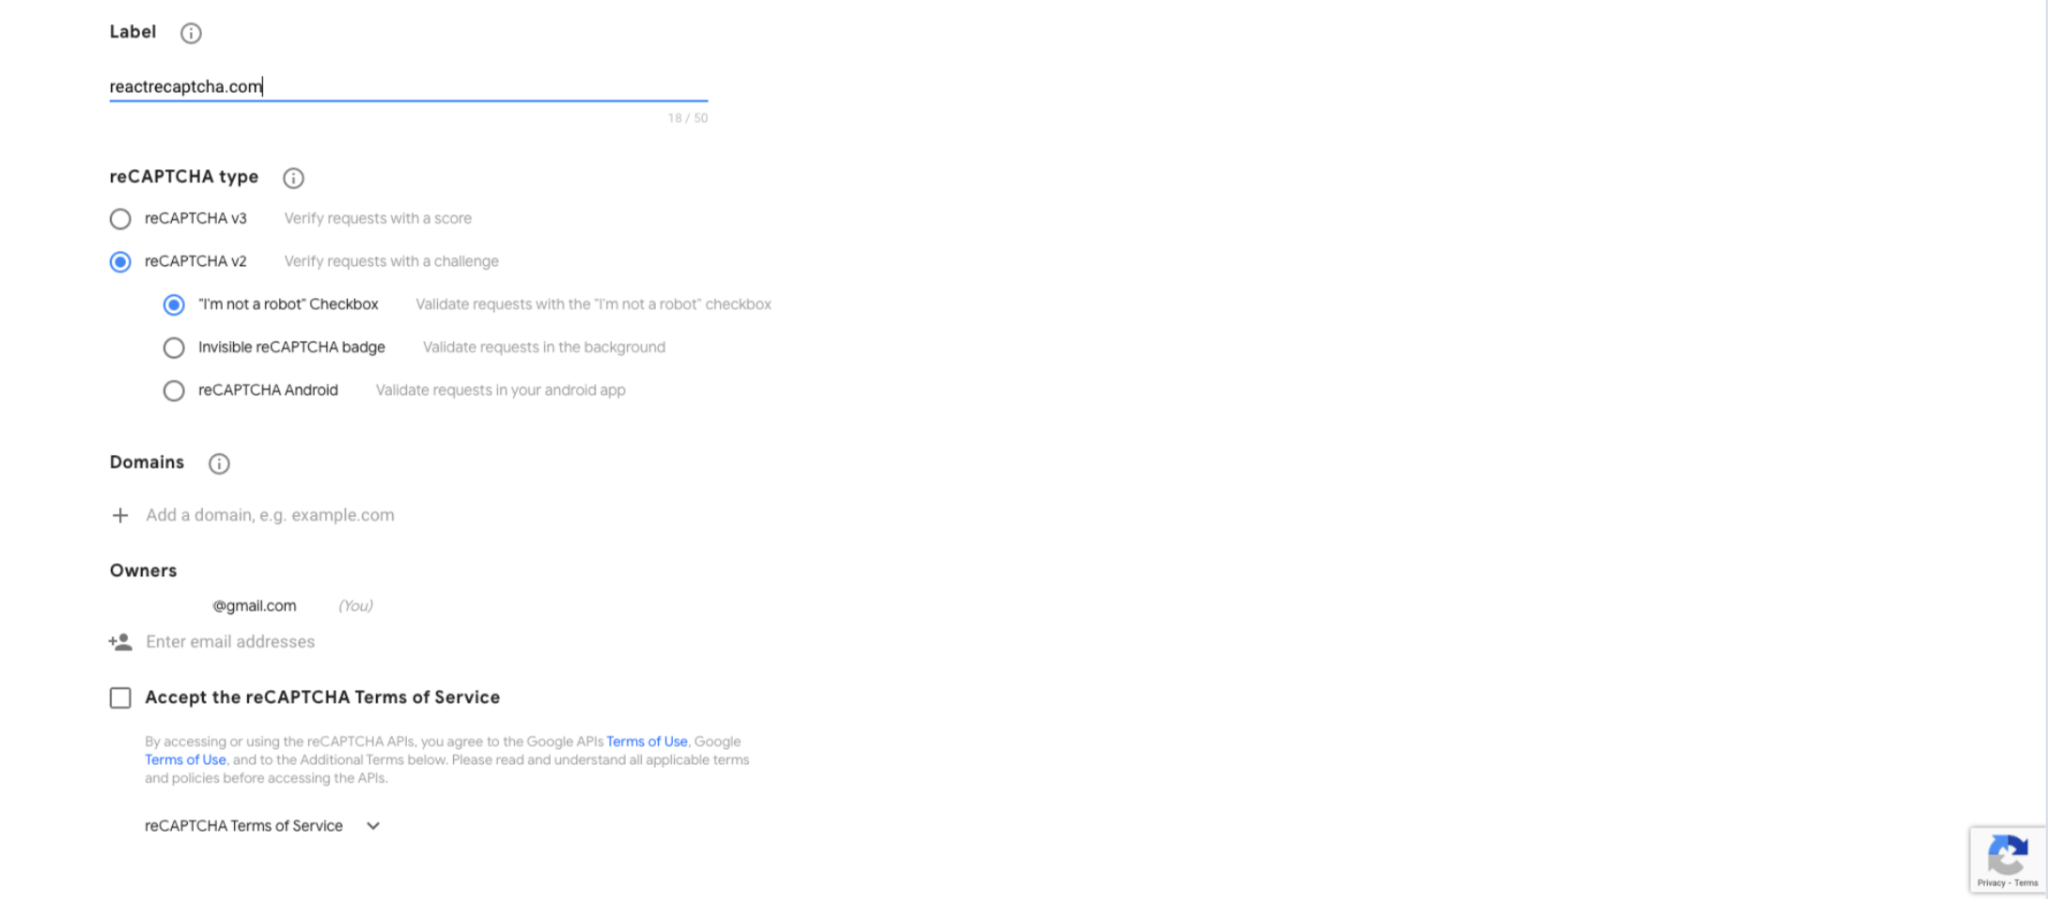
From your browser, continue to this link. On the page, enter your name i.e. _label, and select _reCAPTCHA v2_ as below:
Enter your domain, localhost, or your preferred domain:
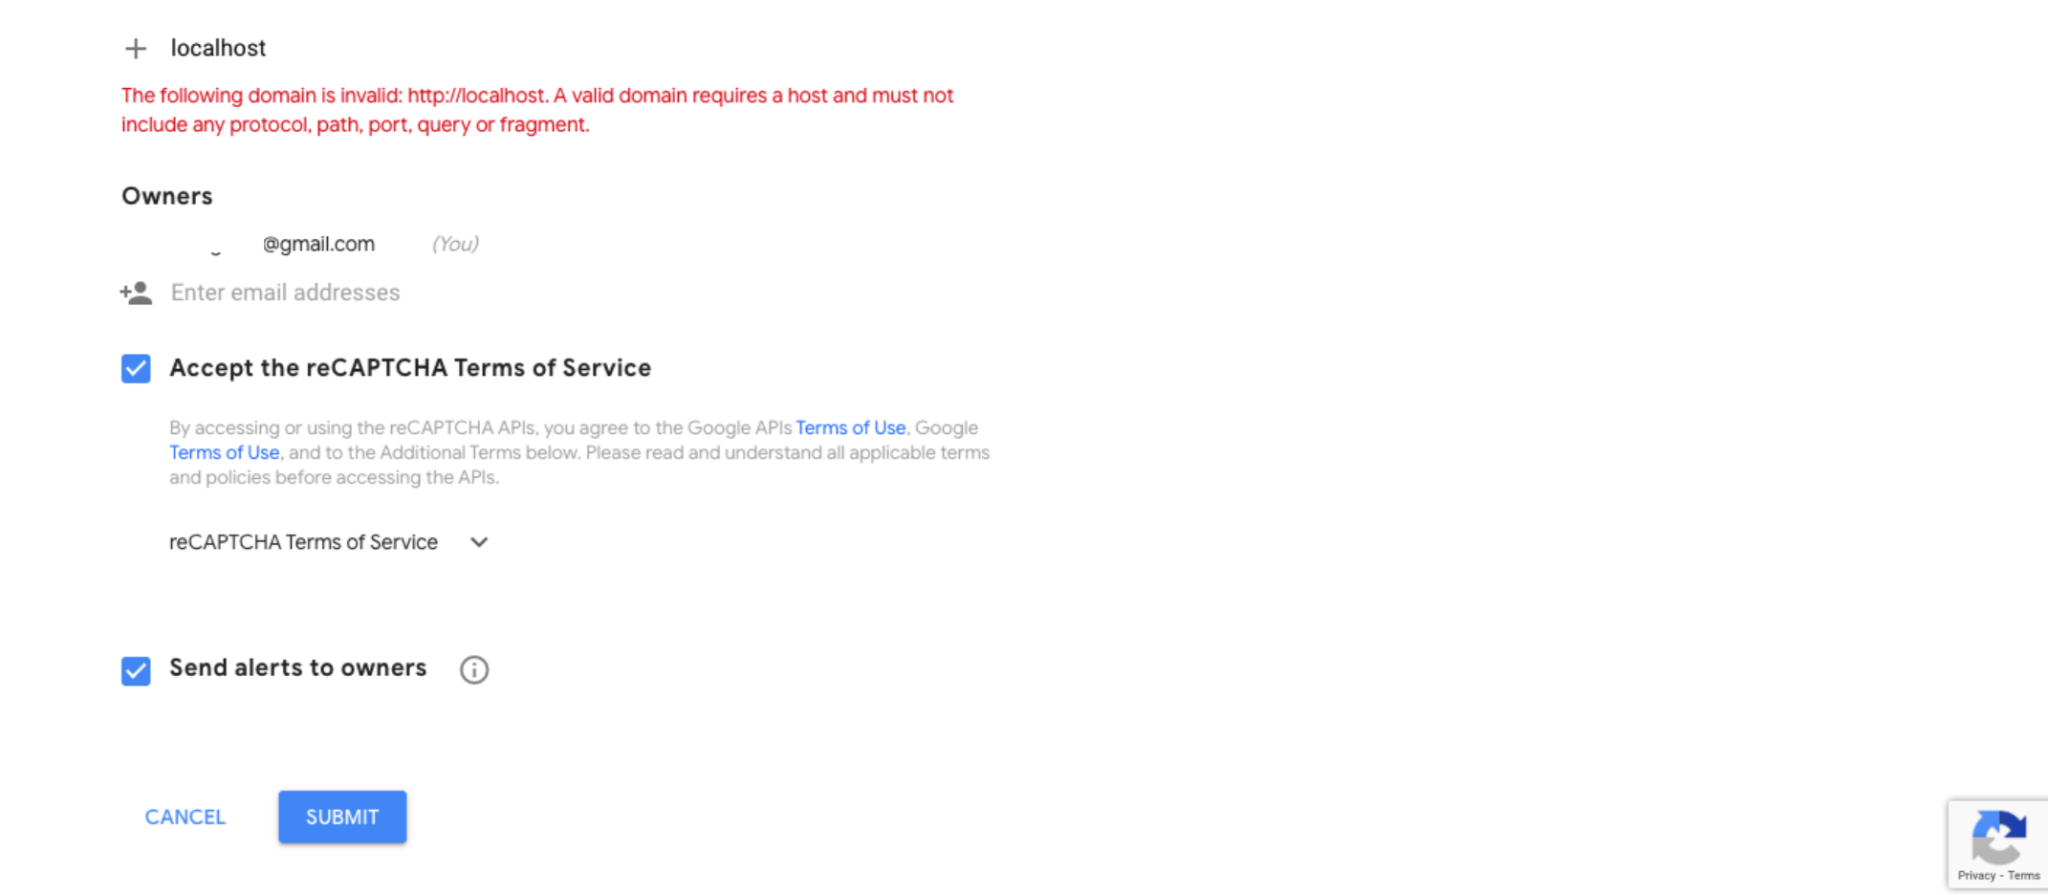
Note: When running the application for development purposes, add Localhost as the Domain name On the above Google dashboard. Ensure the letter L is capitalized in the Localhost name.
Then click on submit. You will be redirected to a different page containing your secret and site keys.
On your project root directory, create a .env file. In the .env file, paste in the credentials as follows:
REACT_APP_SECRET_KEY = "your_secret_key";
REACT_APP_SITE_KEY = "your_site_key";
Integrating Recaptcha to the Form Component
Lets now edit src/App.js as follows to load the Recaptcha on the created form:
- Import the
recaptchapackage:
import Reaptcha from "reaptcha";
- Set up the captcha token and the captcha
ref:
const [captchaToken, setCaptchaToken] = useState("");
const captchaRef = useRef(null);
- Define a function that will be used to verify the token from the ReCaptcha package:
const verifyToken = () => {
  captchaRef.current.getResponse().then((res) => {
    setCaptchaToken(res);
  });
};
- Chip in the ReCaptcha component after the first name form field, providing the site key,
ref, andverifyTokenfunctions:
<div className="formGroup">
  <Reaptcha
    sitekey={process.env.REACT_APP_SITE_KEY}
    ref={captchaRef}
    onVerify={verifyToken}
  />
</div>
- On the handle form submit function, add a check to ensure we have a captcha token:
const handleSubmit = (e) => {
  e.preventDefault();

  setError("");

  setMessage("");

  if (first_name && last_name) {
    if (captchaToken) {
      setMessage("Hurray!! you have submitted the form");
    } else {
      setError("You must confirm you are not a robot");
    }
  } else {
    setError("First name and Last name are required");
  }
};
Testing
Ensure your development server is still up and running. Or use the following command to start it:
npm run start
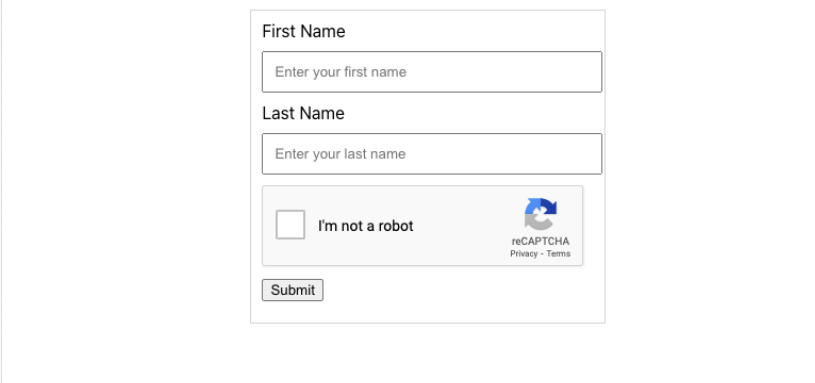
Open http://localhost:3000/ on your browser to access the application. Your home page should have the following form component:
On successful verification, you will get the following check from Recaptcha:

Conclusion
Implementing reCAPTCHA in your React Apps allows you to prevent spam and bots from accessing your application. In this article, you learnt how implement Google reCAPTCHA V2 on a React.js application and I hope you found it helpful!!!
More Related Articles:
-

The Complete Guide to Creating Flask APIs with React apps
Integrating a Flask with a React involves setting up communication between the two using HTTP requests to send and receive data. You will create a
Jul 31, 2023
-

Complete Guide to Material UI in Angular and JSON-Server
Material UI provides a huge collection of ready-made components such as buttons, toolbars, icons, inputs, etc. Material UI will make the development
Aug 5, 2023
-

Consuming GraphQL API with React.js
GraphQL is a query language that allows clients to request exactly the data they need and nothing more. This approach is more efficient than REST.
Jul 29, 2023
-

How to Build and Implement Infinite Scroll in React Apps
Have you ever created an application that serves user data from a backend server or an API? These APIs will have a huge list of data you want to
Jul 28, 2023