Using Prisma ORM with Node.js and PostgreSQL
Posted July 29, 2023

Prisma is a Node.js and typescript ORM. an ORM that means Object Relational Mapping tool that can communicate with databases such as MongoDB, MySQL PostgreSQL, SQLite, etc.
Prisma allows you to connect to your databases and perform any database-related operation. This will enable you to create applications without manually setting up your database. Prisma handles this for you. With just a few lines of code, your data will be published to the database of your choice. In this tutorial, we will learn how to run Prisma with a Node.js Project.
Prerequisites
- Ensure you have Node.js installed on your computer
- Ensure PostgreSQL is installed on your computer.
- Ensure Postman is installed on your computer.
- Ensure you understand how to use the Node.js framework to run JavaScript backend applications.
Setting Node.js project
Just like any other Node.js project, you need to first initialize a Node.js application to be able to use the Node.js dependencies and framework. In this case, Prisma is our main focus. Thus we need a ready project to run Node.js.
Create a project directory and initialize Node.js using the following command:
npm init -y
This will automatically initialize Node.js by creating a package.json file that will host your Node.js configuration and high-level dependencies.
Setting up Prisma
We will set up a Prisma project that uses PostgreSQL relational database. First, we need to install Prisma dependencies using the following command:
npm install prisma @prisma/client
Once we have these dependencies installed, we can go ahead and initialize Prisma for the Node.js project using the following command:
npx prisma init
This will create a folder inside the root folder with a schema.prisma file and an environment file (.env) at the root directory. This forms the basic Prisma setup you can now use to model your data and choose which database to use.
Database Set up
With Prisma, you can choose a wide range of databases. This include PostgreSQL, MySQL, SQLite, SQLserver, MongoDB or CockroachDB. In this case, we are using the PostgreSQL database. Ensure PostgreSQL is up and running on your local computer.
To use any database with Prisma, you need the database connection string. This is the database URL that connects to your running database. The debase we are using is running locally. Thus we need a PostgreSQL connection string so that Prisma can connect to Ensure PostgreSQL as follows.
- postgre-user - The username of your PostgreSQL database.
- postgre-password - The password that connects your PostgreSQL server.
- postgre-db-name - The database name that Prisma will create on PostgreSQL.
For example:
DATABASE_URL="postgresql://postgres:12345678@localhost:5432/products?schema=public"
Make sure this URL has the correct credentials that you are using on your PostgreSQL database. Then copy this URL and add it to the .env file of your Prisma Node.js project.
Creating a Database table using Prisma
To feed the data to the database, we need a table. Prisma creates this using a Model. Go to the schema.prisma file and create the database model as follows:
- Add the model name:
model Product {
}
The model name represents the database table name that will be created on PostgreSQL.
- Add table fields
Let’s add the field that the Product database will have. This goes inside the model name as follows: Each name represents a single row of the table. In this case, we are setting any characteristic that goes in with each raw. For example:
- Id will be created by default with an auto-increment value.
id Int @id @default(autoincrement())
- Name and description will have a String value of Varchar length 255.
name String @unique
description String @db.VarChar(255)
- DateCreated represents the DateTime a record was created with default time as now (the exact time the record was created).
dateCreated DateTime @default(now())
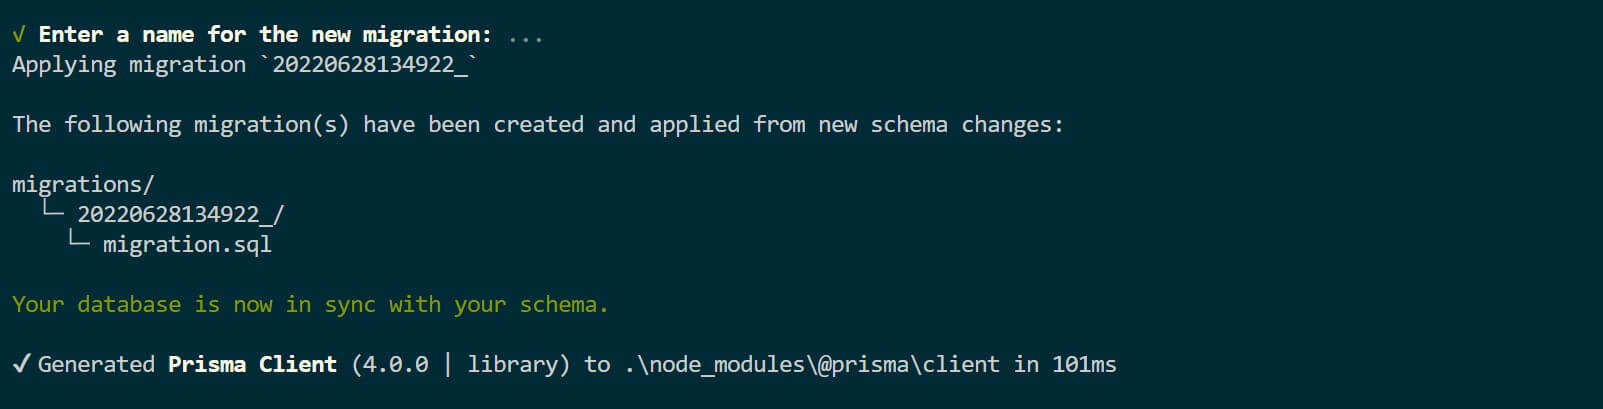
Now we have the model that will create our database as the table. We will execute a single command to migrate this model and sync it with the PostgreSQL database. Go ahead and run the following command:
npx prisma migrate dev

You will also be prompted to Enter a name for the new migration. Provide this name and hit enter.
A migration creates a database version whenever you edit and sync your Prisma Model. This helps to keep track of changes made to the database.
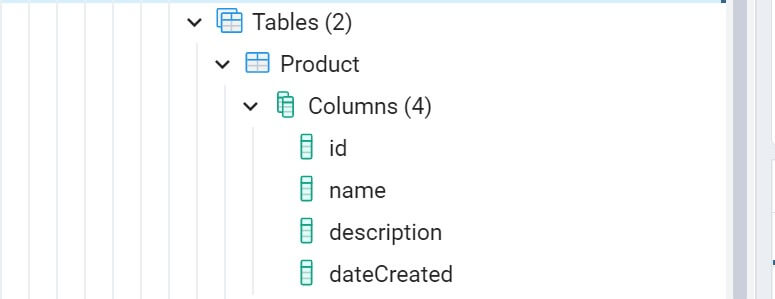
And now, the database is in sync with the Prisma schema. To check this, go ahead and refresh your PostgreSQL database. A product DB will be created.
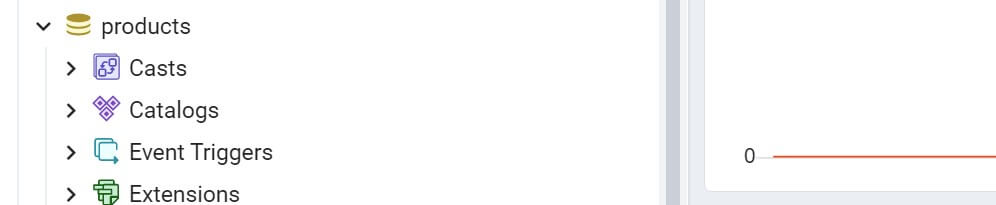
The tables Product with the respective columns will also get created.
Create a Prisma Node.js API
With this setup, you can create an API and use it for your application. Let’s create a basic Node.js API that uses thus Prisma setup. First, install express to your project to be able to create a server;
npm install express
Create an index.js file and the root directory of your project the set the API as follows:
- Import the dependencies:
// Add express to create a local server
const express = require('express');
// Add PrismaClient to communicate with the databse
const { PrismaClient } = require('@prisma/client');
- Create the express and PrismaClient middlewares:
// initialize express
const app = express();
// add the express middlewares
app.use(express.json());
// initialize prisma to execute database operations
const prisma = new PrismaClient();
- Create a product
// create a post route
app.post('/products', async (req, res) => {
   // add the product payload/request info
   const product = {
      // get the product name from the request body
     name: req.body.name,
     // get product description from the request body
     description: req.body.description,
   };
   // add an execution message
   const message = 'Product added successfully.';
   // Get the product details and execute them with Prisma
   await prisma.product.create({ data: product });
      // If a product is added, log a success message on postman
   return res.json({ message });
});
- Get products
// create an endpoint to fetch products from the database
app.get('/products', async (req, res) => {
   // using the prisma findMany method, get all the product
   const allProducts = await prisma.product.findMany({});
   // append the fetched product to the response body
   res.json(allProducts);
});
- Update a product
// create an endpoint to update the product details based on product id
app.put('/products/:id', async (req, res) => {
   // get the parameter id before proceeding and decide which product needs to be updated
   const id = parseInt(req.params.id);
 // add the product details to be updated
   await prisma.product.update({
      // specify the id parameter
     where: {
       id: id
     }
   })
   // return the json payload of the updated data with a success message
   return res.json({ message: "Product update successfully" });
});
- Delete a product
// execute an endpoint to erace an existing product
app.delete('/products/:id', async (req, res) => {
   // delete the product based on the product id
   // parse the parameter id to the request
   const id = parseInt(req.params.id);
   // specify the id parameter of the specif product to be deleted
   await prisma.product.delete({ where: { id: id } });
   // return the json payload of the deleted data with a success message
   return res.json({ message: "Product deleted successfully" });
});
- Set up the server:
// execute the local port to run the server
app.listen(port, () => {
   // Log the server information on the terminal
   console.log(` Server Listening Port ${port}`);
});
Run the following command to test the API:

Testing
To test the API, open Postman and intact with the setup as follows:
- Create a new product:
Open a new Postman and send a POST method to http://localhost:3000/products. Then select the Body tab, raw, and use JSON. Add new product details as follows:
{
   "name":"A long sleeve wedding dress",
   "description":"We take great pride in letting customers from all around the world purchase our wedding and special occasion items."
}
Your postman screen should resemble the following image:
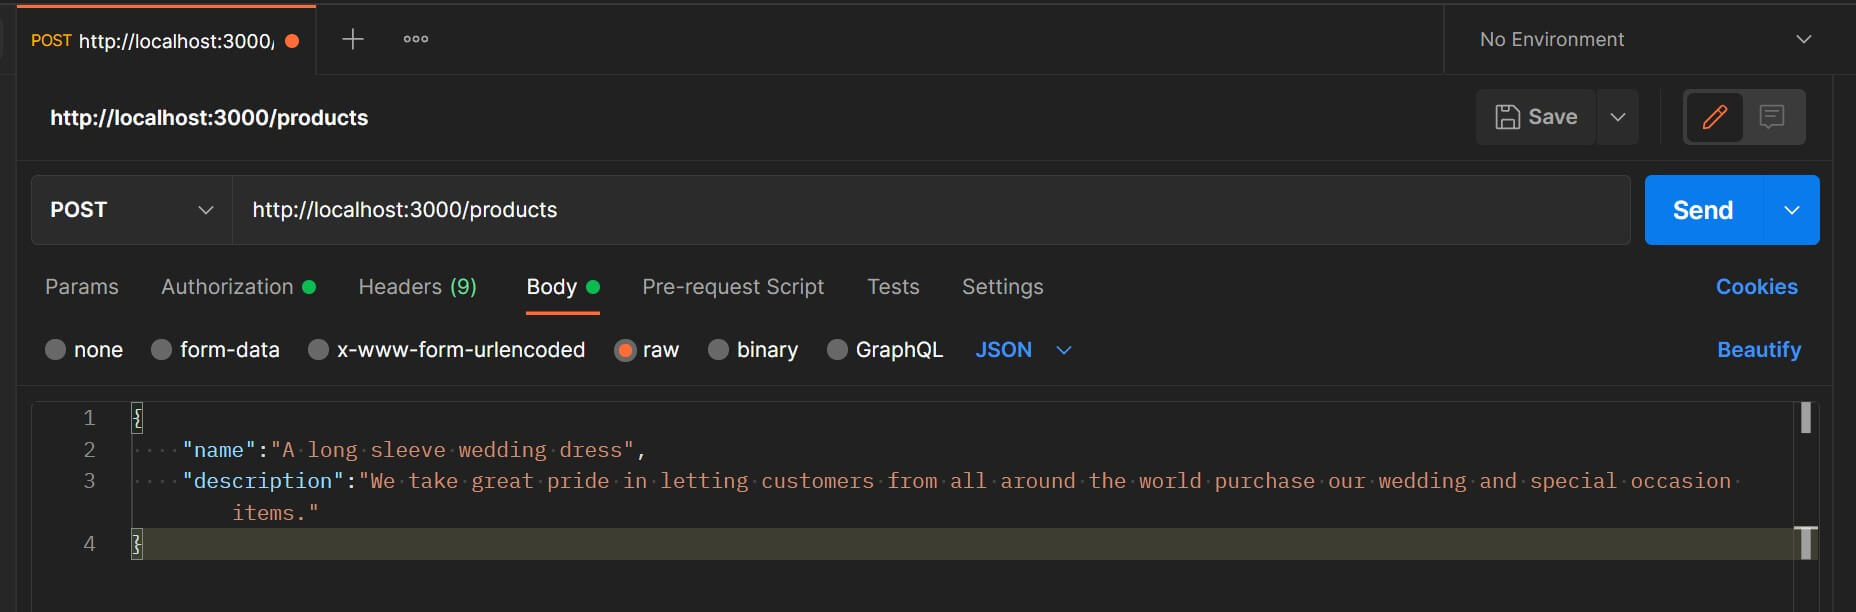
Click SEND to execute this POST request. Postman will show a success message if this gets executed correctly.
{
   "message": "Product added successfully."
}
You can go ahead and view the record on your database:

Follow the above step and add more items to the database:
- Fetch the products:
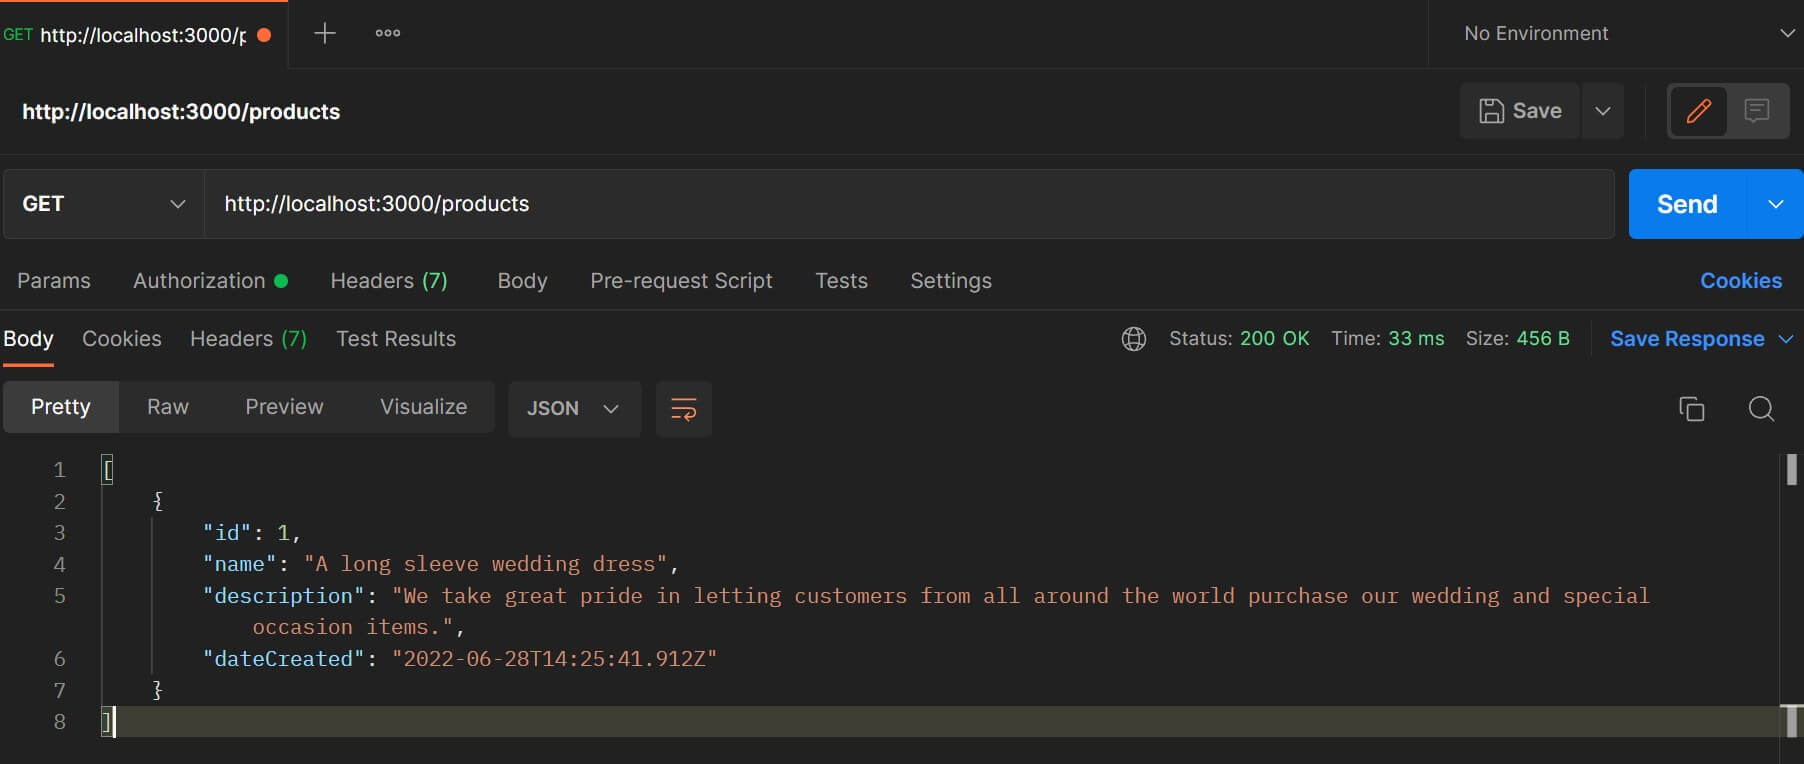
To fetch the products from the database, send a GET request to http://localhost:3000/products using Postman.
Now you can try out other routes for updating and deleting products.
Conclusion
Now, with the new found knowledge, learn Database Migrations with NestJS and TypeORM? TypeORM is an ORM for JavaScript and typescript that simplifies how you interact with a database. It has support for NoSQL and SQL-related databases.
I hope this tutorial was helpful!
More Related Articles:
-
How to Create React Apps With Node.js Express Server
React is a JavaScript-based framework for building fast and interactive UIs for mobile and web apps. Currently, it’s the most popular JavaScript
Jul 27, 2023
-

How to use CORS in Node.js With Express - Resolve CORS Error With Examples
CORS (Cross-Origin Resource Sharing) is a security feature implemented by web browsers to block web pages from requesting a different domain not
Jul 19, 2023
-

Ultimate Guide to Building Node.js REST APIs using TypeScript
Typescript can be defined as a strict syntactical superset of JavaScript. It allows you to use features such as static typing to help you detect
Jul 19, 2023
-

Guide to Creating CRUD APIs in Flask
Flask is a web framework for building web applications using Python. It is known for its lightweight and simple design. This makes it easy to get
Jul 28, 2023