Ultimate Guide to Creating Django REST Framework CRUD APIs
Posted August 1, 2023

Django is a Python-based open-source web framework. It provides support for handling HTTP requests and responses. This way, you can build APIs-related applications. Django also provides a built-in administrative interface to help you interact with the APIs you have created.
Django is built to give you the ability to handle large and complex projects with just a few lines of code. Creating APIs with Django provides you with the Django REST framework. Django REST framework is purposely created to help you streamline the way you create RESTful APIs using Django. This guide will teach you how to build Django RESTful CRUD APIs using the Django REST framework.
Before proceeding with the guide, ensure you have Python 3 installed on your computer.
Setting up a Django
Before creating a Django application, it is important to set up a Python virtual environment for your project. A virtual environment allows you to manage dependencies and packages for different projects. Virtual environments help you keep each project’s dependencies separate to prevent conflicts. This way, each project uses its own package versions without conflict with other Django projects you may create on your local machine.
To set up a virtual environment, you will use pipenv. Pipenv creates and manages a virtual environment for your project and keeps track of the dependencies using a Pipfile file. It also created a Pipfile.lock to save the versions of all packages used on your project.
To use pipenv, navigate to your local project directory and run the following command:
pip install pipenv
Using pipenv, go ahead and create and activate the virtual environment with this command:
pipenv shell

With that, you can now install Django for our project:
pipenv install django
Creating a Django Project
Inside your project directory, go ahead and run the following command:
django-admin startproject django_tasks_api
This will create a basic Django app with the following folder structure.
└───django_tasks_api
│ manage.py
│
├───django_tasks_api
│ asgi.py
│ settings.py
│ urls.py
│ wsgi.py
│ __init__.py
The main files you need to note are:
manage.py- allows you to run your application management commands, such as running the development server and creating and initializing a database.django_tasks_api/settings.py- contains the configuration need to create a Django application. You will use it to configure the application further.django_tasks_api/urls.py- It executes the URL patterns for accessing the Django API.
Let’s now start working and creating an API. First, change the directory to the created django_tasks_api folder:
cd django_tasks_api
Start your API app using the following command:
python manage.py startapp tasks
This will add a new tasks directory with the following structure:
└───tasks
│ admin.py
│ apps.py
│ models.py
│ tests.py
│ views.py
│ __init__.py
│
└───migrations
__init__.py
You will work alongside this directory to build our API. To execute the application, you will be required to add the create tasks to the list INSTALLED_APPS in the django_tasks_api/settings.py file as follows:
INSTALLED_APPS = [
'tasks',
]
It’s important to note that your API will use an SQLite database. This is the default database for Django. This means that you don’t have to configure the database connection manually. It is already set up to use SQLite by default.
Now you can go ahead and install Django REST framework to start working on the API:
pipenv install djangorestframework
You will also need to add it to the list INSTALLED_APPS list in the django_tasks_api/settings.py file so Django can execute it.
INSTALLED_APPS = [
'tasks',
'rest_framework',
]
Creating the API Model
Django uses models to define the database schema of your API. In Django, a model contains:
- Classes that represent the tables in the database
- Each class represents a table
- The class contains attributes for creating the columns in the table.
To create a model, navigate to tasks/models.py and add the following code.
from django.db import models
# Create your models here.
class Tasks(models.Model):
title = models.CharField(max_length=255)
description = models.TextField()
created_at = models.DateTimeField(auto_now_add=True)
updated_at = models.DateTimeField(auto_now=True)
def __str__(self):
return self.title
This will create a model Task with four attributes. Once you create a model, Django uses Object-Relational Mapping (ORM) system to map the models to the database table without writing raw SQL. This add using the migration commands as follows:
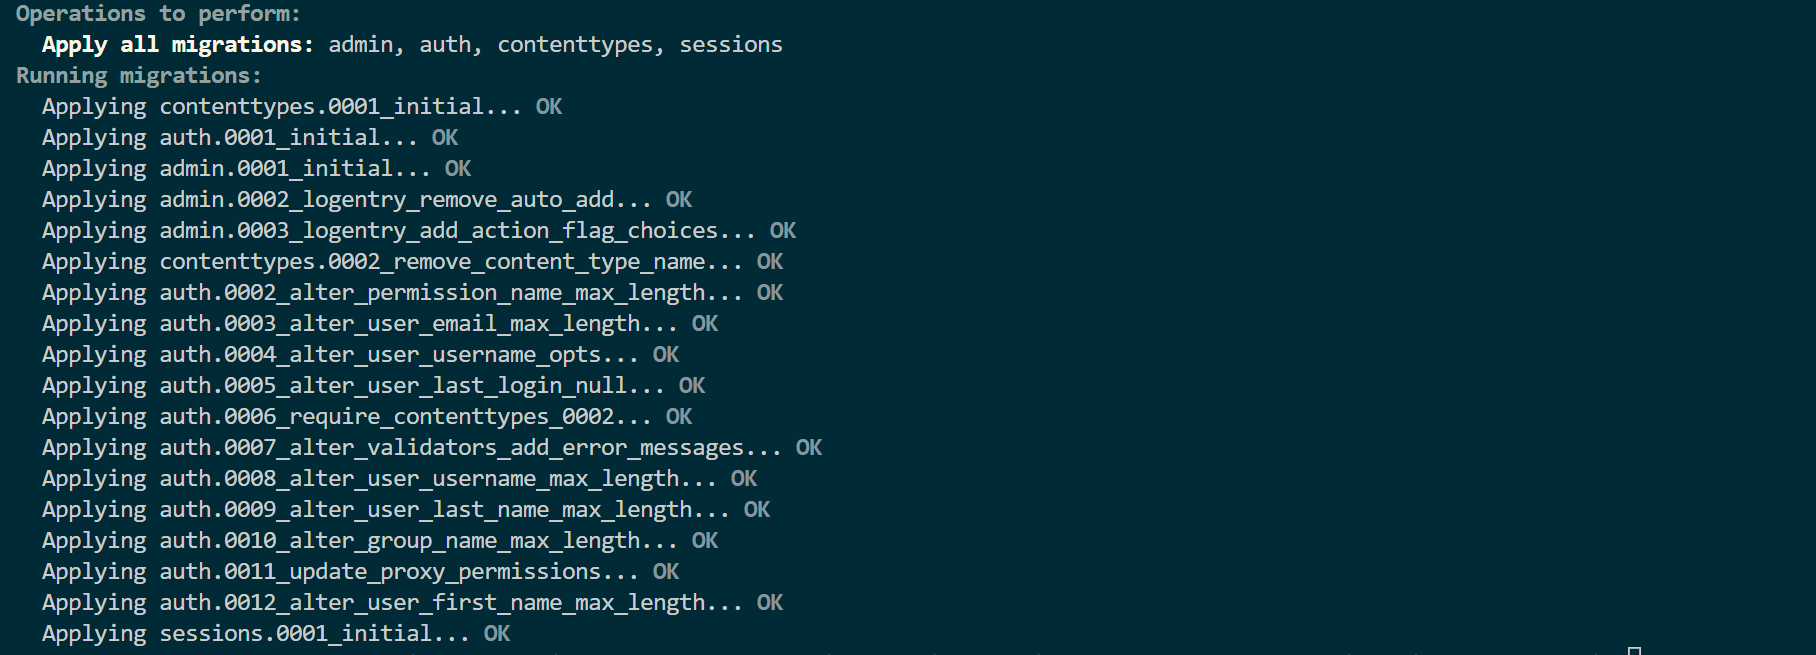
python manage.py makemigrations
This will check the changes. To apply the model, run the following command:
python manage.py migrate
A file named db.sqlite3 will be generated in the root directory of your project to store the SQLite database.
Creating the Model Serializer
Serializer converts the Django model you have created into JSON s that you can send raw JSON data using the API. Create a tasks/serializers.py file and add the ModelSerializer as follows:
from rest_framework import serializers
from .models import Tasks
class TaskSerializer(serializers.ModelSerializer):
class Meta:
model = Tasks
fields = ('id', 'title', 'description', 'created_at', 'updated_at')
Creating the API Views
To interact with requests and responses, you need to create Views. This allows you to execute the CRUD operations. When using the Django Rest Framework.
Navigate to the tasks/views.py file. Your View should be as follows:
from rest_framework.viewsets import ModelViewSet
from .models import Tasks
from .serializers import TaskSerializer
# Create your views here.
class TasksViewSet(ModelViewSet):
queryset = Tasks.objects.all()
serializer_class = TaskSerializer
Accessing the API
Finally, you need URLs for accessing the API. Therefore, you need the URL patterns for the application. To add them, create a tasks/urls.py as follows:
from django.urls import path
from rest_framework import routers
from .views import TasksViewSet
router = routers.DefaultRouter()
router.register('tasks', TasksViewSet)
urlpatterns = router.urls
To execute this URL patterns, navigate to django_task_api/django_task_api/urls.py and make the following changes:
from django.contrib import admin
from django.urls import path, include
from django.contrib import admin
from django.urls import path, include
urlpatterns = [
path('admin/', admin.site.urls),
path('api/', include('tasks.urls'))
]
Testing the API
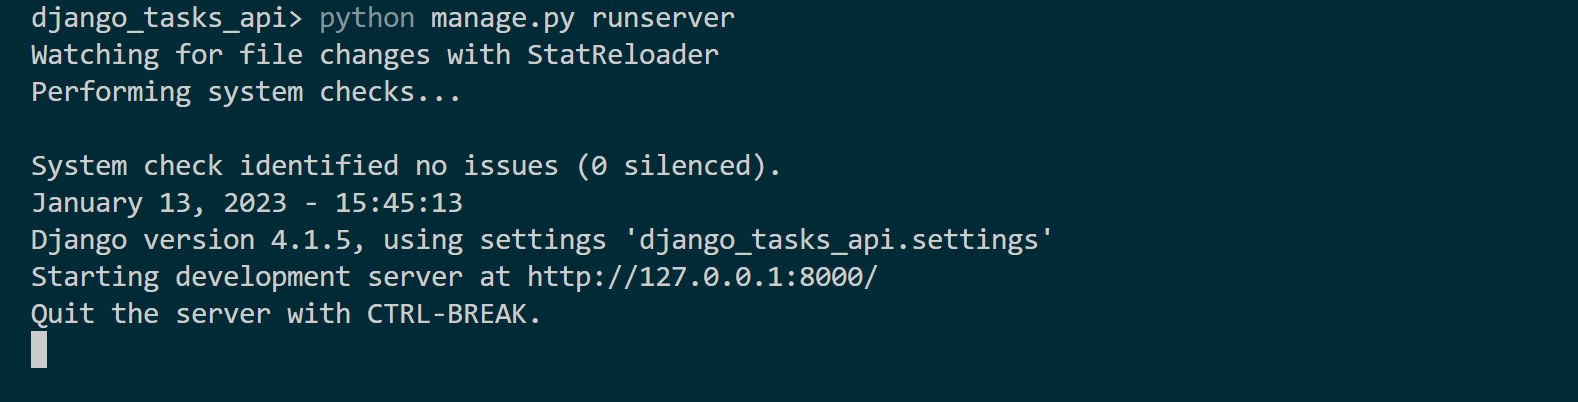
The API is now ready. Run the application using the following command:
python manage.py runserver
Exposing the API
The above test is done using Django admin. If you want to access the API externally, you can use the following endpoints:
- Create: http://127.0.0.1:8000/api/tasks
- Read: http://127.0.0.1:8000/api/tasks
- Update: http://127.0.0.1:8000/api/todos/id/
- Delete: http://127.0.0.1:8000/api/todos/id/
Note: you should provide the id based on the task you want to delete or update.
Also, consuming the API externally may require you to addCORS Headers. Therefore, install the cors header package for Django: To install the cors package, use the following command:
pipenv install django-cors-headers
Add the installed to the django_task_api/django_task_api/settings.py to the list of INSTALLED_APPS as follows:
INSTALLED_APPS = [
"todos",
'rest_framework',
'corsheaders',
]
In the same file, add corsheaders to the MIDDLEWARE and CORS_ORIGIN_ALLOW_ALL = True as follows:
MIDDLEWARE = [
'corsheaders.middleware.CorsMiddleware',
]
CORS_ORIGIN_ALLOW_ALL = True
Now that you have mastered Django RESTful CRUD APIs using the Django REST framework, why not dive deeper into Python and learn how to Creating CRUD APIs in Flask? Or get wilder learning this Complete Guide to Creating Flask APIs with React apps and take your skills to new heights.
Conclusion
This tutorial has wrapped everything you need to understand Django while creating straightforward Django REST APIs. I hope you found it useful.
More Related Articles:
-

Using Prisma ORM with Node.js and PostgreSQL
Prisma is a Node.js and typescript ORM. an ORM that means Object Relational Mapping tool that can communicate with databases such as MongoDB, MySQL
Jul 29, 2023
-

Guide to Creating CRUD APIs in Flask
Flask is a web framework for building web applications using Python. It is known for its lightweight and simple design. This makes it easy to get
Jul 28, 2023
-
How to Create React Apps With Node.js Express Server
React is a JavaScript-based framework for building fast and interactive UIs for mobile and web apps. Currently, it’s the most popular JavaScript
Jul 27, 2023
-
Implementing Laravel User Authentication Tutorial With Code Examples
In this article, we will implement authentication on a Laravel project while using a LoginRadius Sdk.
Jul 22, 2023