How to Create Android Notifications Like a PRO
Posted August 7, 2023
This tutorial will teach you how to create Android notifications like a PRO using code examples. You will comprehensively understand Android notifications and be able to create notifications for your Android applications.
Let’s dive into building Android notifications and elevate your app’s user experience to new heights!
Notifications Intro
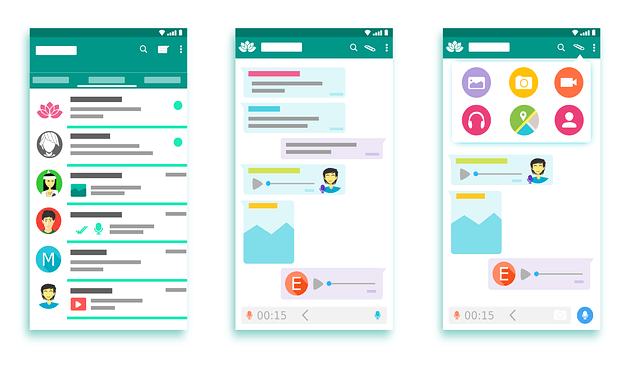
Android notification is short or timely information about the action happening in the app, even if it is not running. It is an app’s message, alert, or status. It appears with an icon, title, and some content text in the notification area. When we want to see the details of the notification, then we can open the notification drawer. The notification’s primary purpose is to notify the user about a process, reminders, or other timely events from the app.
Android Notification has four types.
- Status Bar:- This type of notification is displayed in the same layout as the current time and battery percentage.
- Notification drawer:- This type of notification is displayed in the drop-down menu.
- Heads-Up Notification:- This type of notification is displayed on the overlay screen, for example, OTP messages and Whatsapp.
- Lock Screen Notification:- This type of notification is displayed on the lock screen.

Set Android Notification Properties**
The Android Notifications set uses NotificationCompat.Builder object. There are the following set of notification properties:-
setSmallcon():- This set is used to set the notification icon.setContentTitle():- This is used to set the notification’s title.setContentText():- With the help of this set, we can set the text message.setAutoCancel():- This is used to cancel the property of the notification.setPriority():- This is used to set the priority of the notification.
Android Notification Example
In the notification example, we will create a notification message to launch another activity after clicking on it.
We will be creating this example step by step as follows:
Step 1: Create a New Project in
Start by creating a new Android project in your Android Studio.
Step 2:- Working with the layout file
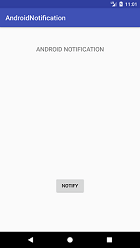
Now, we will be designing our layout file. We will use ConstraintLayout and TextView to display the text, and the Button will be used to send notification messages. In the activity_main.xml file, add the following code:
<?xml version="1.0" encoding="utf-8"?>
<android.support.constraint.ConstraintLayout xmlns:android="http://schemas.android.com/apk/res/android"

xmlns:app="http://schemas.android.com/apk/res-auto"
xmlns:tools="http://schemas.android.com/tools"
android:layout_width="match_parent"
android:layout_height="match_parent"
tools:context="MainActivity">

<TextView
    android:layout_width="wrap_content"
    android:layout_height="wrap_content"
    android:text="ANDROID NOTIFICATION"
    app:layout_constraintBottom_toBottomOf="parent"
    app:layout_constraintLeft_toLeftOf="parent"
    app:layout_constraintRight_toRightOf="parent"
    app:layout_constraintTop_toTopOf="parent"
    app:layout_constraintVertical_bias="0.091" android:textAppearance="@style/Base.TextAppearance.AppCompat.Medium"/>
<Button
    android:layout_width="wrap_content"
    android:layout_height="wrap_content"
    android:id="@+id/button"
    android:layout_marginBottom="112dp"
    android:layout_marginEnd="8dp"
    android:layout_marginStart="8dp"
    android:text="Notify"
    app:layout_constraintBottom_toBottomOf="parent"
    app:layout_constraintEnd_toEndOf="parent"
    app:layout_constraintStart_toStartOf="parent" />
</android.support.constraint.ConstraintLayout>
Step 3: Design the Second layout file
We need to create an empty activity and name the activity as activity_notification_view.xml. When the user clicks on the notification, then the Second activity will open up in the app. In this activity, we will use ConstraintLayout and TextView to display and receive the notification message. In this activity file, adds the following code:-
<?xml version="1.0" encoding="utf-8"?>
<android.support.constraint.ConstraintLayout
xmlns:android="http://schemas.android.com/apk/res/android"
xmlns:app="http://schemas.android.com/apk/res-auto"
xmlns:tools="http://schemas.android.com/tools"
android:layout_width="match_parent"
android:layout_height="match_parent"
tools:context="NotificationView">

<TextView

    android:id="@+id/textView2"
    android:layout_width="fill_parent"
    android:layout_height="wrap_content"
    android:gravity="center"
    android:text="your detail of notification..."
    android:textAppearance="@style/Base.TextAppearance.AppCompat.Medium" />

<TextView

    android:id="@+id/textView"
    android:layout_width="wrap_content"
    android:layout_height="wrap_content"
    android:layout_marginBottom="8dp"
    android:layout_marginEnd="8dp"
    android:layout_marginStart="8dp"
    android:layout_marginTop="8dp"
    app:layout_constraintBottom_toBottomOf="parent"
    app:layout_constraintEnd_toEndOf="parent"
    app:layout_constraintHorizontal_bias="0.096"
    app:layout_constraintStart_toStartOf="parent"
    app:layout_constraintTop_toBottomOf="@+id/textView2"
    app:layout_constraintVertical_bias="0.206"
    android:textAppearance="@style/Base.TextAppearance.AppCompat.Medium"/>
</android.support.constraint.ConstraintLayout>
Step 4: Working with the MainActivity
In the MainActivity.java file, first, we set the clickListener on the button. Then inside the button, we will call the addNotification() method. The addNotification() method will be called when a user clicks the button. In this method, we implement the NotificationCompat.Builder object to set the notification properties. We use the NotificationManager.notify() method to display the notification.
We use the Intent class because we call another activity on taping the notification. We use NotificationCompat.Builder objects to set notification properties. We use setSmallIcon() to set the icon, setContentTitle() to set the title, setContentText() to set the notification message, setAutoCancel() to auto-cancel the notification, and setPriority() to set priority to the notification.
import android.app.NotificationManager;
import android.app.PendingIntent;
import android.content.Context;
import android.content.Intent;
import android.support.v4.app.NotificationCompat;
import android.support.v7.app.AppCompatActivity;
import android.os.Bundle;
import android.view.View;
import android.widget.Button;

public class MainActivity extends AppCompatActivity {

  Button button;
  @Override
  protected void onCreate(Bundle savedInstanceState) {
    super.onCreate(savedInstanceState);
    setContentView(R.layout.activity_main);
    button = findViewById(R.id.button);
    button.setOnClickListener(new View.OnClickListener() {
      @Override
      public void onClick(View v) {
        addNotification();
      }
    });
  }

  private void addNotification() {
    NotificationCompat.Builder builder =
      new NotificationCompat.Builder(this)
      .setSmallIcon(R.drawable.messageicon)
      .setContentTitle("Notifications Example")
      .setContentText("This is a notification message").setAutoCancel(true).setPriority(NotificationCompat.PRIORITY_DEFAULT);
    Intent notificationIntent = new Intent(this, NotificationView.class);

    notificationIntent.addFlags(Intent.FLAG_ACTIVITY_CLEAR_TOP);

    notificationIntent.putExtra("message", "This is a notification message");

    PendingIntent pendingIntent = PendingIntent.getActivity(this, 0, notificationIntent,
      PendingIntent.FLAG_UPDATE_CURRENT);
    builder.setContentIntent(pendingIntent);

    // Add as notification
    NotificationManager manager = (NotificationManager) getSystemService(Context.NOTIFICATION_SERVICE);
    manager.notify(0, builder.build());
  }
}
Step 5: Working with the second activity
This class is used to receive the notification message. In the NotificationView class, we use TextView to receive and display the notification message. The NotificationView class is invoked while tapping the notification.
import android.support.v7.app.AppCompatActivity;
import android.os.Bundle;
import android.widget.TextView;
import android.widget.Toast;

public class NotificationView extends AppCompatActivity {

  TextView textView;
  @Override
  protected void onCreate(Bundle savedInstanceState) {
    super.onCreate(savedInstanceState);
    setContentView(R.layout.activity_notification_view);
    textView = findViewById(R.id.textView);

    //getting the notification message
    String message = getIntent().getStringExtra("message");
    textView.setText(message);
  }
}
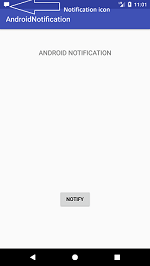
Output:

Now that you have mastered How to Create Android Notifications, why not dive deeper, and get more outlandish learning A Complete Guide to Making API Calls in Android using Retrofit and take your Android skills to a new height?
Conclusion
In this article, we have successfully created a Notification for an Android application. We learned how to set notification properties. We have created our notification and learned to customize our Android notification icon, text, and title. We have also learned to set priority and Android auto-cancel on the notification. Why Not dive in and learn this Guide to Making API Calls in Android using Retrofit