Guide to Razor Page CRUD using ASP.NET Core and HTML
Posted August 4, 2023

Mastering Razor Page CRUD is the craft Combo for web applications using ASP.NET Core and HTML. This comprehensive guide delves into Razor Pages with ASP.NET Core using hands-on examples.
Embark on this journey to elevate your ASP.NET web apps with Razor Page CRUD!
Overview
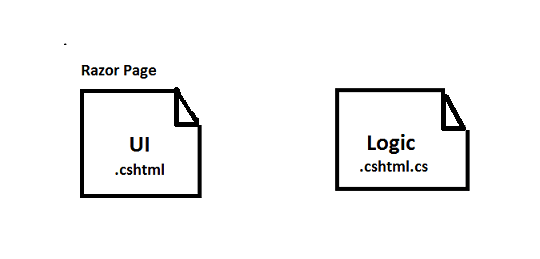
Razor pages are a simplified and easier-to-use page-based web application programming model focusing on a file-based routing approach, eliminating much workload. Each razor page will have a related c# document called the page model, which holds page behavior.
Razor pages use C# programming language for server-side programming and easy-to-learn razor page templates for embedding c# in HTML to generate content for browsers dynamically and server-side HTML generation.
Benefits of this setup include:
- It helps to build and update the UI quickly. Code for the page is kept with the page while keeping UI and business logic concerns separate.
- Easily testable and scalable to large apps.
- Keep ASP.NET Core pages organized more straightforwardly than ASP.NET MVC.
- View specific logic and view models can be kept together in their namespace and directory.
Let’s dive in and implement a Database Table in a Razor Page using ASP.NET Core Framework as such.
Step 1: Create a New Project
Open a new project as follows ASP.NET Core Web App:
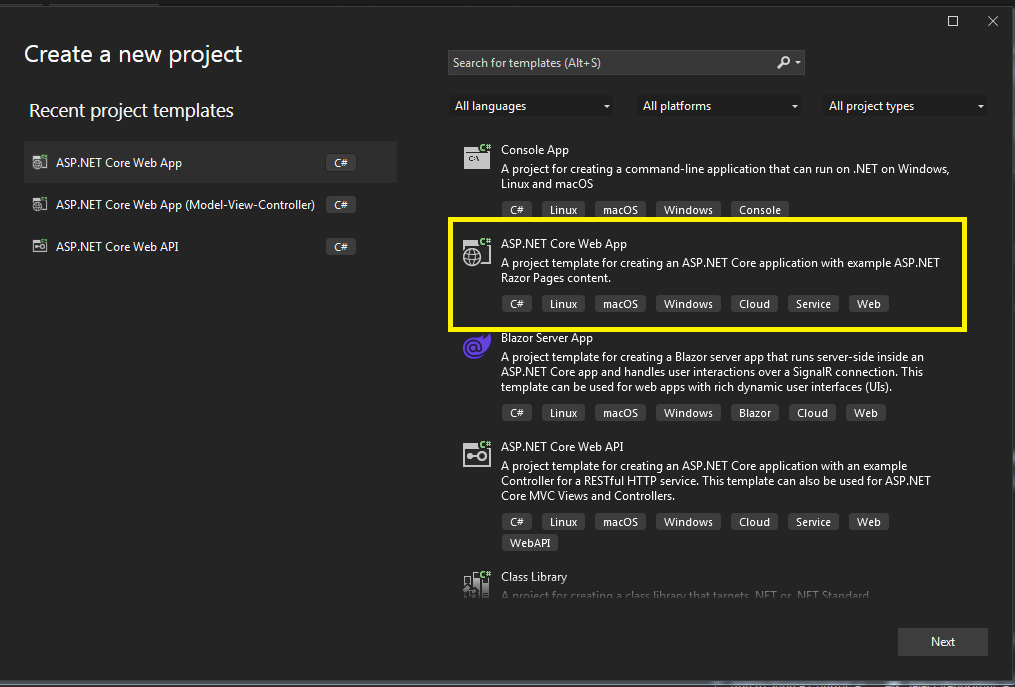
Select it and click on Next. Next, give a name to your project, and here I am giving the name Pizza as I was trying to develop a pizza delivery app.
Step 2: Connect to the Database
Click on the View tab and server explorer. This will open the server explorer on the left-hand side, as shown below:
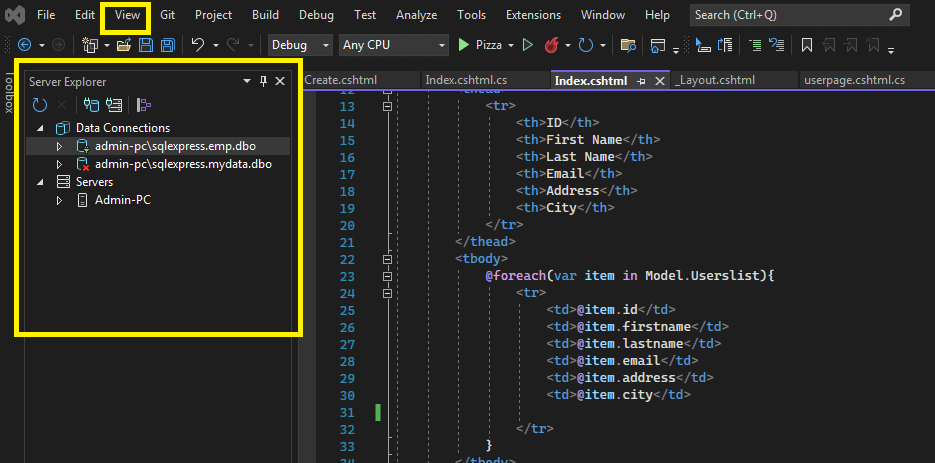
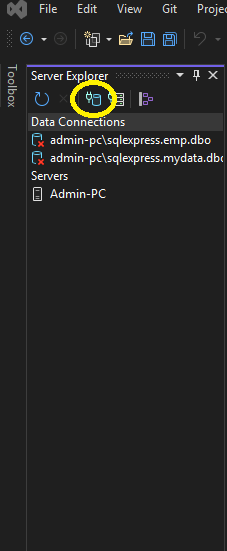
Connect to the database by clicking the highlighted button in the above image.
The following window will pop:
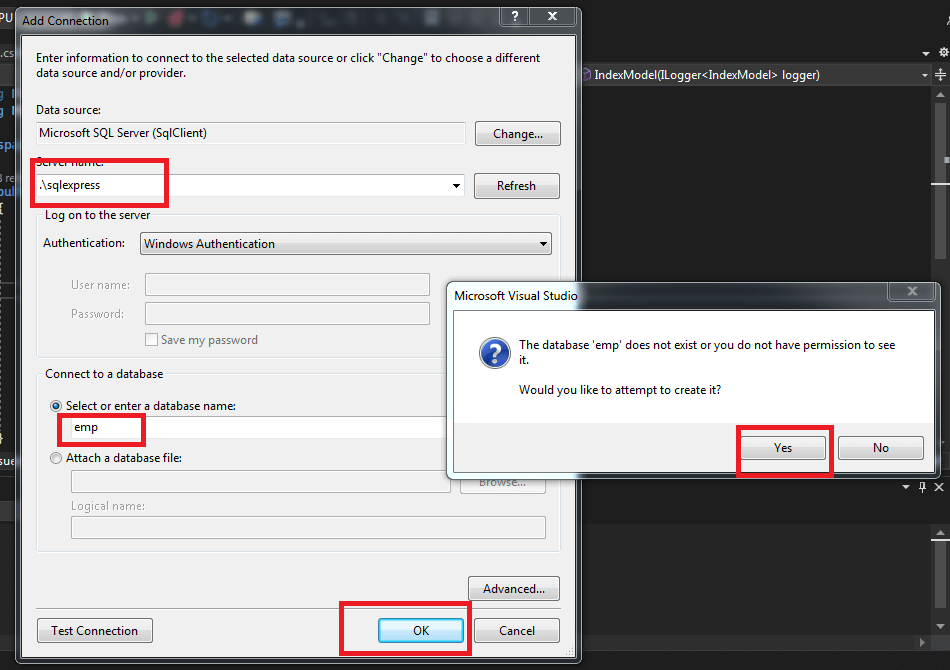
Now that we have successfully connected to the database, let’s create a new table. Right-click on the connection and click on execute new Query as shown in the below image.
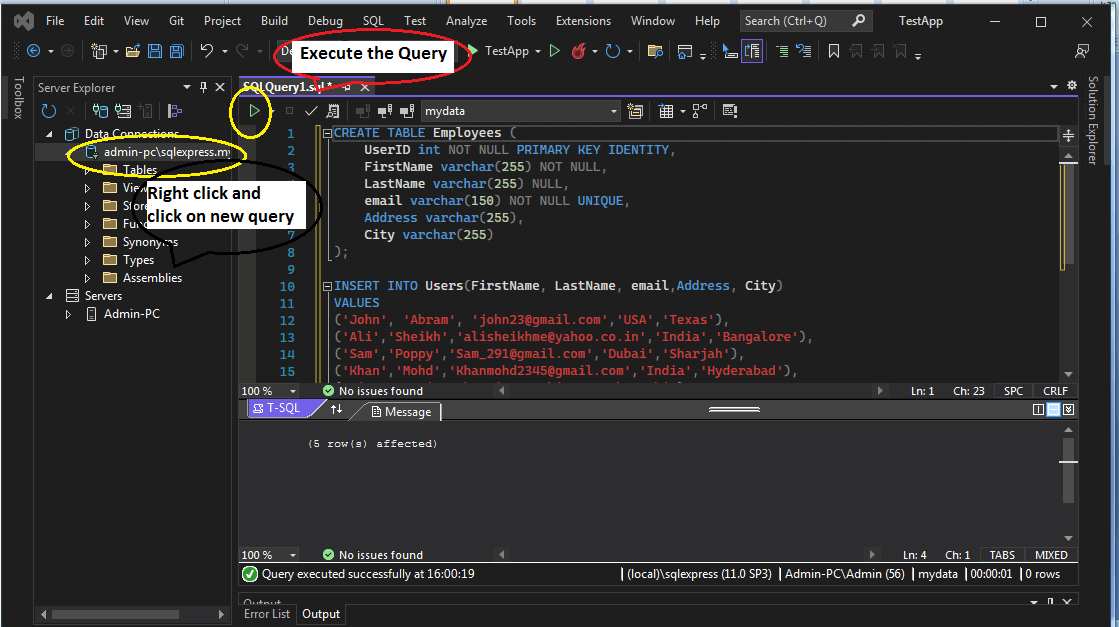
Enter the following query to create a table named Users with various fields. And then, we write a query to insert a few values in the table we just created.
CREATE TABLE Users (

UserID int NOT NULL PRIMARY KEY IDENTITY,

FirstName varchar(255) NOT NULL,

LastName varchar(255) NULL,

email varchar(150) NOT NULL UNIQUE,

Address varchar(255),

City varchar(255)

);

INSERT INTO Users(FirstName, LastName, email,Address, City)

VALUES

('John', 'Abram', 'john23@gmail.com','USA','Texas'),

('Ali','Sheikh','alisheikhme@yahoo.co.in','India','Bangalore'),

('Sam','Poppy','Sam\_291@gmail.com','Dubai','Sharjah'),

('Khan','Mohd','Khanmohd2345@gmail.com','India','Hyderabad'),

('Tim','','tim@yahoo.in','Pakistan','karachi')
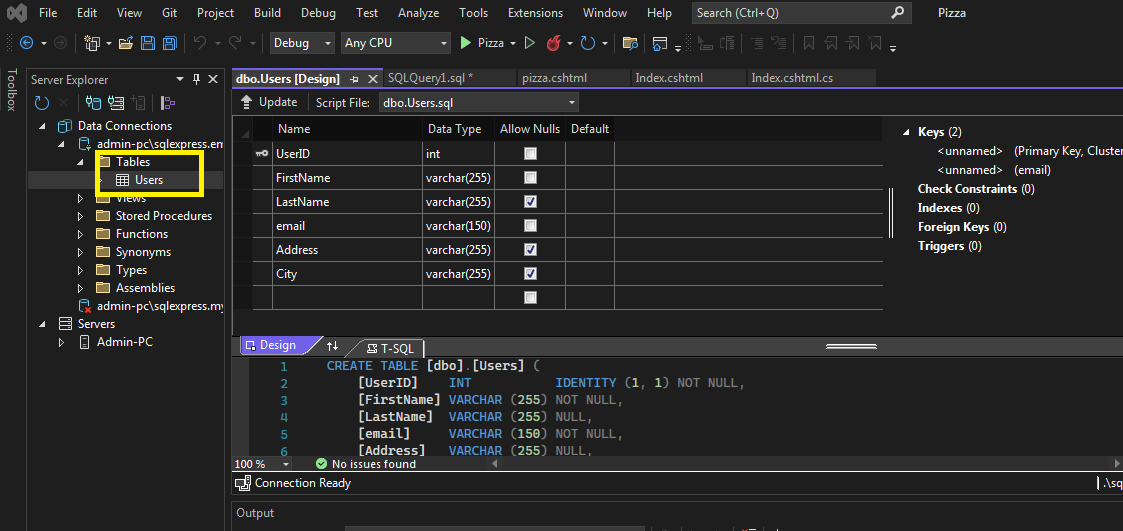
Let’s now refresh the connection with the database, and you can find that the table we have just created is visible in the image screenshot below:
Right click on the Employees table and click on Show Table Data:
Step 3: Add NuGet Package
The next step is to add a package named as System.Sql.Client. To do so, right click on the project in the solution explorer and click on Manage Nuget Packages.
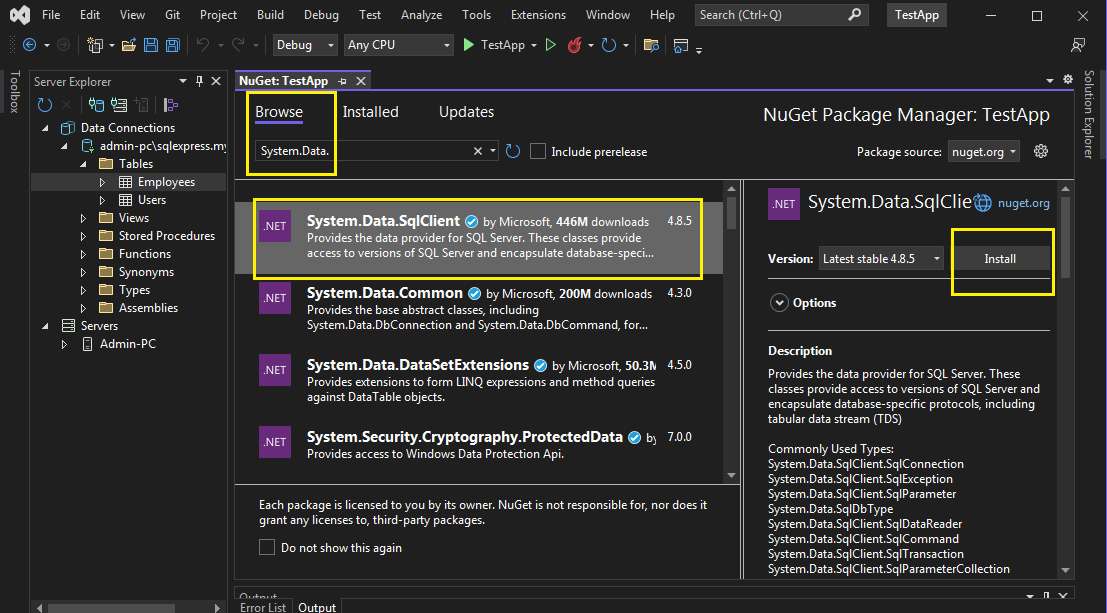
Finally, click on Ok and then I Accept to make these changes:
Step 4: Create a layout to display data
You can note that the template gets loaded with a page named index.cshtml by default.
Next, go ahead and create a layout on the page named index.cshtml. Open the page and add the following code.
@page

@model IndexModel

@{

ViewData["Title"] = "Home page";

}

<div class="text-center">

    <h1 class="display-4">Users</h1>

    <br>

    <h2>List of Users</h2>

    <table class="table">

        <thead>

            <tr>

                <th>ID</th>

                <th>First Name</th>

                <th>Last Name</th>

                <th>Email</th>

                <th>Address</th>

                <th>City</th>

            </tr>

        </thead>

        <tbody>

            @foreach(var item in Model.Userslist){

            <tr>

                <td>@item.id</td>

                <td>@item.firstname</td>

                <td>@item.lastname</td>

                <td>@item.email</td>

                <td>@item.address</td>

                <td>@item.city</td>

            </tr>

            }

        </tbody>

    </table>

</div>
In the above html code, we create a table with the table head containing all the fields we created in our database table. Next, in the table data, we write a C# code and iterate over each item in the list of users we are accessing using Model.Userlist. You will easily understand it in the next step.
Step 5: Write Code to Connect to Database Server
Right click on the above code and click on View Code. This will open the file index.cshtml.cs.
using Microsoft.AspNetCore.Mvc;

using Microsoft.AspNetCore.Mvc.RazorPages;

using System.Data.SqlClient;

namespace Pizza.Pages

{

public class IndexModel : PageModel

{

private readonly ILogger<IndexModel> _logger;

public IndexModel(ILogger<IndexModel> logger)

{

_logger = logger;

}

public List<UserInfo> Userslist = new List<UserInfo>();

public void OnGet()

{

try

{

String ConnectionString = "Data Source=.\\sqlexpress;Initial Catalog=emp;Integrated Security=True";

using (SqlConnection connection = new SqlConnection(ConnectionString))

{

String sql = "SELECT * FROM Users";

using (SqlCommand command = new SqlCommand(sql, connection))

{

using (SqlDataReader reader = command.ExecuteReader())

{

while (reader.Read())

{

UserInfo userinfo = new UserInfo();

userinfo.id = "" + reader.GetInt32(0);

userinfo.firstname = reader.GetString(1);

userinfo.lastname = reader.GetString(2);

userinfo.email = reader.GetString(3);

userinfo.address = reader.GetString(4);

userinfo.city = reader.GetString(5);

Userslist.Add(userinfo);

}

}

}

}

}

catch (Exception ex)

{

Console.WriteLine("Exception: " + ex.ToString());

}

}

}

public class UserInfo

{

public string id;

public string firstname;

public string lastname;

public string email;

public string address;

public string city;

}

}
Initially, we are defining a Connection String. You can get the connection string by right click on the connection and clicking on the properties as shown below:
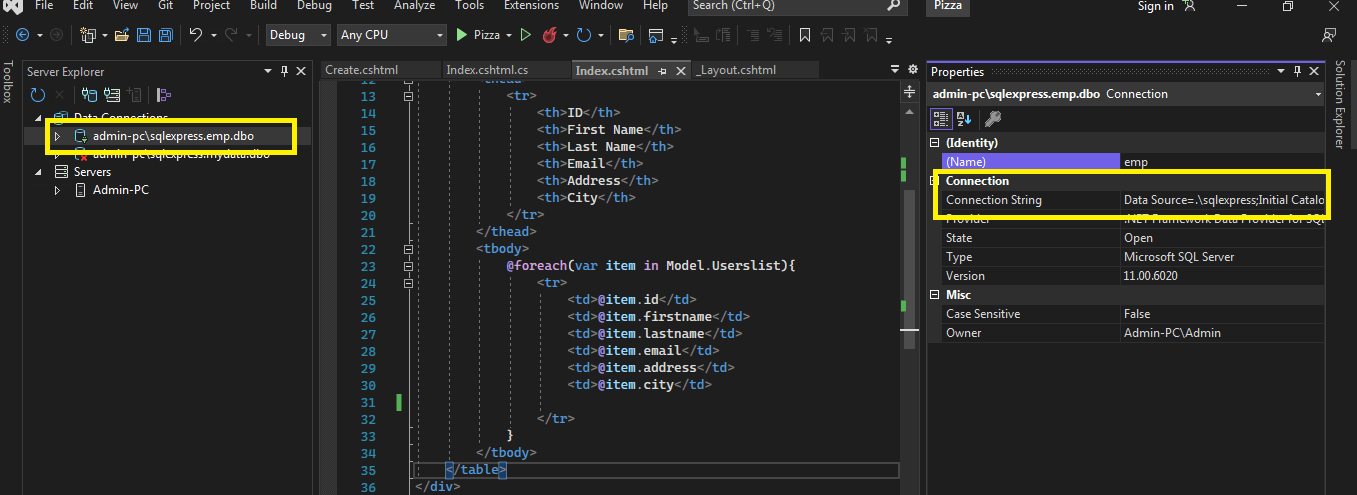
We are then using the package to carry out various commands. We are reading the table values in a list named Userslist.
Step 6: Build the application
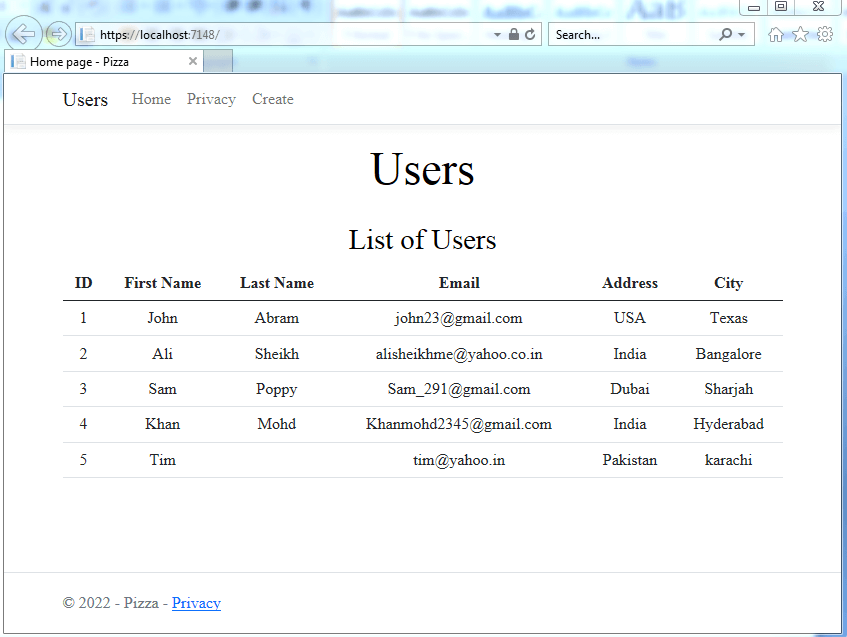
Let’s now build the application and check if the data from the database is displayed. You can see that the table data is displayed in an HTML Table, as shown in the below screenshot.
Conclusion
I hope you have understood the basics, such as getting the data from the database and displaying it on a Razor Page. You can add various operations such as Create, Edit, and Delete on the database table using razor pages.