Complete Guide to Material UI in Angular and JSON-Server
Posted August 5, 2023

Material UI provides a huge collection of ready-made components such as buttons, toolbars, icons, inputs, etc. Material UI will make the development process super faster.
This guide will teach you how to use Material UI in Angular. Using Material UI, you will build a CRUD app using JSON-Server. Dive in and build this simple employee management app with Angular, Material UI, and JSON-Server.
Prerequisites:
To follow along, ensure you have the NodeJS installed on your machine.
Setting Up the Project
To set up our Angular project, install Angular CLI via the following command:
npm install -g @angular/cli
Run the following command to start a basic Angular app:
ng new simple-employee-management-crud-app
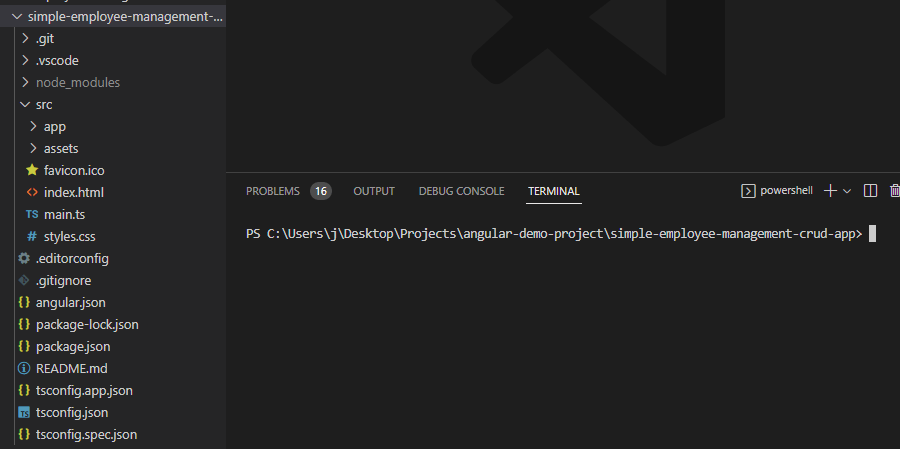
In this tutorial, use the default settings. Angular cli will create a new project with the default setup and boilerplate code. The following image with all the helper libraries installed:
Change your directory and point to the newly created project folder:
cd simple-employee-management-crud-app
To confirm the create app is working, run the following command:
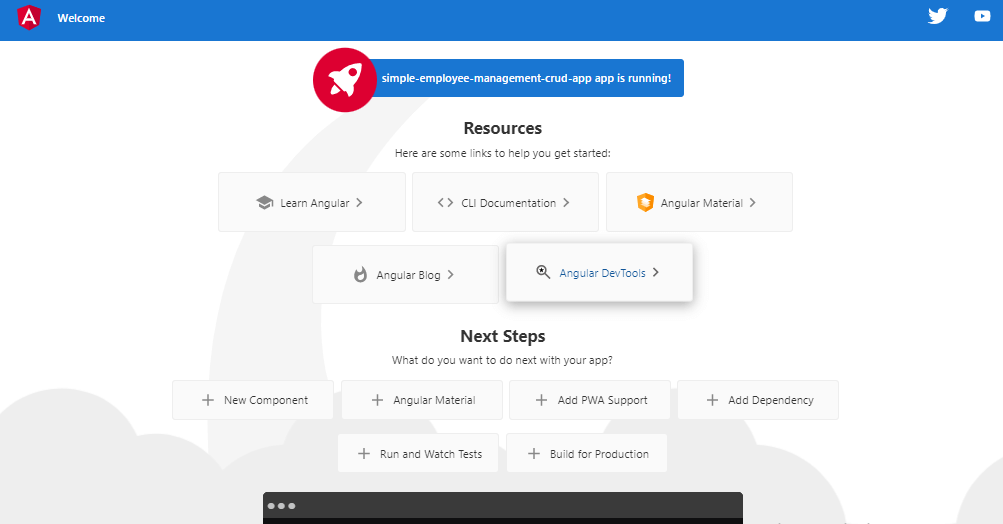
ng serve -o
Your app will be served on http://localhost:4200 as follows:
Let’s install the libraries we need for Material UI:
ng add @angular/material
You will create an Angular Material-based app. This app will use a JSON-Server to interact with data. Therefore ensure you have these libraries installed:
npm install -g json-server
Creating Mock Database
The JSON server will be simple as follows:
- Create a `db.json`` file in the project root directory (not inside the src)
- Add the following dates to your
db.jsonas follows:
{
    "employees": [
        {
            "id": 1,
            "firstName": "Brinn",
            "lastName": "Jephcote",
            "email": "bjephcote0@archive.org",
            "dob": "1981-10-05T12:09:39Z",
            "gender": "Female",
            "education": "Graduate",
            "company": "Gabspot",
            "experience": 36,
            "salary": 37
        },
        {
            "id": 2,
            "firstName": "Kenneth",
            "lastName": "MacElholm",
            "email": "kmacelholm1@sina.com.cn",
            "dob": "1991-09-12T22:14:02Z",
            "gender": "Male",
            "education": "Matric",
            "company": "Agivu",
            "experience": 75,
            "salary": 17
        }
    ]
}
Here we’re just storing some employee details, and feel free to add more using the above as the exmaple.
To use this data, start the JSON server running the following command:
json-server --watch 'db.json'
This will locally start a server at port 3000 where Angular will send CRUD requests.
Creating the Service
In Angular, services are used to manage shared data and state between components. You will create a service for managing employee data as such. To generate the employee service, run the following command:
ng generate service employee –skip-tests
Angular will create a boilerplate employee.service.ts service file inside the src/app directory. Let’s now
implement the logic for getting, adding, updating, and deleting data
employees in the employee service. Your employee.service.ts file should reflect as follows:
import { HttpClient } from "@angular/common/http";
import { Injectable } from "@angular/core";
import { Observable } from "rxjs";

@Injectable({
  providedIn: "root",
})
export class EmployeeService {
  baseUrl: string = "http://localhost:3000/";

  constructor(private httpClient: HttpClient) {}

  addEmployee(data: any): Observable<any> {
    return this.httpClient.post(this.baseUrl + "employees", data);
  }

  updateEmployee(id: number, data: any): Observable<any> {
    return this.httpClient.put(this.baseUrl + `employees/${id}`, data);
  }

  getEmployeeList(): Observable<any> {
    return this.httpClient.get(this.baseUrl + "employees");
  }

  deleteEmployee(id: number): Observable<any> {
    return this.httpClient.delete(this.baseUrl + `employees/${id}`);
  }
}
Here, you’ve added four methods for CRUD methods using the built-in HttpClient service for sending requests to the
JSON-server.
Now that the service is complete, let’s build the components necessary for this app.
Creating the Components
A component is a building block of the application. It manages a UI piece, handles user interactions, and renders data. You will create one as follows:
- You will create the
emp-add-editcomponent. This component will be responsible for adding or updating an employee. To create this component, run the following command in the terminal:
ng generate component emp-add-edit –skip-tests
This command will create an emp-add-edit directory inside the /src/app folder and other necessary files with some boilerplate code for you.
You will use this component as the dialog(modal) to create and update an employee. So, for now, let’s keep it
like this and move on to make the toolbar and employee table inside the app component. To do so, open up the app.component.html file and the following code:
<!-- The toolbar of our app -->

<mat-toolbar color="primary">
    <span>Employee Management Crud App</span>

    <span class="example-spacer"></span>

    <button mat-raised-button color="accent" (click)="openAddEditEmployeeDialog()">
        ADD EMPLOYEE
    </button>
</mat-toolbar>

<!-- The body of our app -->

<div class="main-body">
    <!-- The filter section -->

    <mat-form-field aria-haspopup="outline">
        <mat-label>Filter</mat-label>

        <input matInput (keyup)="applyFilter($event)" placeholder="i.e David Smith" #input />
    </mat-form-field>

    <!-- The employee details table -->

    <div class="table-container">
        <table mat-table [dataSource]="dataSource" matSort>
            <ng-container matColumnDef="id">
                <th mat-header-cell *matHeaderCellDef mat-sort-header>ID</th>

                <td mat-cell *matCellDef="let row">{{row.id}}</td>
            </ng-container>

            <ng-container matColumnDef="firstName">
                <th mat-header-cell *matHeaderCellDef mat-sort-header>First Name</th>

                <td mat-cell *matCellDef="let row">{{row.firstName}}</td>
            </ng-container>

            <ng-container matColumnDef="lastName">
                <th mat-header-cell *matHeaderCellDef mat-sort-header>Last Name</th>

                <td mat-cell *matCellDef="let row">{{row.lastName}}</td>
            </ng-container>

            <ng-container matColumnDef="email">
                <th mat-header-cell *matHeaderCellDef mat-sort-header>Email</th>

                <td mat-cell *matCellDef="let row">{{row.email}}</td>
            </ng-container>

            <ng-container matColumnDef="dob">
                <th mat-header-cell *matHeaderCellDef mat-sort-header>DOB</th>

                <td mat-cell *matCellDef="let row">{{row.dob | date}}</td>
            </ng-container>

            <ng-container matColumnDef="gender">
                <th mat-header-cell *matHeaderCellDef mat-sort-header>Gender</th>

                <td mat-cell *matCellDef="let row">{{row.gender}}</td>
            </ng-container>

            <ng-container matColumnDef="education">
                <th mat-header-cell *matHeaderCellDef mat-sort-header>Education</th>

                <td mat-cell *matCellDef="let row">{{row.education}}</td>
            </ng-container>

            <ng-container matColumnDef="company">
                <th mat-header-cell *matHeaderCellDef mat-sort-header>Company</th>

                <td mat-cell *matCellDef="let row">{{row.company}}</td>
            </ng-container>

            <ng-container matColumnDef="experience">
                <th mat-header-cell *matHeaderCellDef mat-sort-header>Experience</th>

                <td mat-cell *matCellDef="let row">{{row.experience}}</td>
            </ng-container>

            <ng-container matColumnDef="salary">
                <th mat-header-cell *matHeaderCellDef mat-sort-header>Salary</th>

                <td mat-cell *matCellDef="let row">{{row.salary | currency:'USD'}}L</td>
            </ng-container>

            <ng-container matColumnDef="action">
                <th mat-header-cell *matHeaderCellDef mat-sort-header>Action</th>

                <td mat-cell *matCellDef="let row">
                    <span (click)="openEditForm(row)" class="action-icon" style="margin-right: 5px">
                        <mat-icon color="primary">edit</mat-icon>
                    </span>

                    <span (click)="deleteEmployee(row.id)" class="action-icon">
                        <mat-icon color="warn">delete</mat-icon>
                    </span>
                </td>
            </ng-container>

            <tr mat-header-row *matHeaderRowDef="displayedColumns"></tr>

            <tr mat-row *matRowDef="let row; columns: displayedColumns;"></tr>

            <!-- This row will be shown without matching data. -->

            <tr class="mat-row" *matNoDataRow>
                <td class="mat-cell" colspan="4">
                    No data matching the filter "{{input.value}}"
                </td>
            </tr>
        </table>

        <mat-paginator [pageSizeOptions]="[5, 10, 25, 100]" aria-label="Select page of users"></mat-paginator>
    </div>
</div>
In this exmaple:
- You’re creating the toolbar for this app, then in the second
- The table for the list of employees
- Creating data pagination functionality.
You are creating these using the Material UI library (if you notice all those custom tags and attributes starting with mat).
In the toolbar, you have a button for adding an employee and
bound a click event to this button. In the click event, pass a method openAddEditEmployeeDialog(). This function will be used to invoke and open our dialog(emp-add-edit component).
Now let’s add the following css code in the app.component.css file to make this Material UI toolbar more beautiful:
.example-spacer {
    flex: 1 1 auto;
}

mat-form-field {
    width: 100%;

    margin: auto;
}

.main-body {
    max-width: 80%;

    margin: 20px auto;
}

.action-icon:hover {
    opacity: 0.8;

    cursor: pointer;
}
Creating the Component Logic
Now it’s time to write the logic for this component. Navigate to the app.component.ts file and paste the following code:
import { Component, OnInit, ViewChild } from "@angular/core";
import { MatDialog } from "@angular/material/dialog";
import { EmpAddEditComponent } from "./emp-add-edit/emp-add-edit.component";
import { EmployeeService } from "./employee.service";
import { MatPaginator } from "@angular/material/paginator";
import { MatSort } from "@angular/material/sort";
import { MatTableDataSource } from "@angular/material/table";

@Component({
  selector: "app-root",
  templateUrl: "./app.component.html",
  styleUrls: ["./app.component.css"],
})
export class AppComponent implements OnInit {
  // the columns that will be displayed in the employee details table

  displayedColumns: string[] = [
    "id",
    "firstName",
    "lastName",
    "email",
    "dob",
    "gender",
    "education",
    "company",
    "experience",
    "salary",
    "action",
  ];

  // employee list will be assigned to this, and it is passed as the data source to the mat-table in the HTML template

  dataSource!: MatTableDataSource<any>;

  @ViewChild(MatPaginator) paginator!: MatPaginator;
  @ViewChild(MatSort) sort!: MatSort;

  // dependency injection

  constructor(
    private dialog: MatDialog,
    private empService: EmployeeService
  ) {}

  ngOnInit(): void {
    this.getEmployeeList();
  }

  openAddEditEmployeeDialog() {
    const dialogRef = this.dialog.open(EmpAddEditComponent);

    dialogRef.afterClosed().subscribe({
      next: (val) => {
        if (val) {
          this.getEmployeeList();
        }
      },
    });
  }

  getEmployeeList() {
    this.empService.getEmployeeList().subscribe({
      next: (res) => {
        this.dataSource = new MatTableDataSource(res);

        this.dataSource.sort = this.sort;

        this.dataSource.paginator = this.paginator;

        console.log(res);
      },

      error: (err) => {
        console.log(err);
      },
    });
  }

  // for searching employees with first name, lastname, gender, etc

  applyFilter(event: Event) {
    const filterValue = (event.target as HTMLInputElement).value;

    this.dataSource.filter = filterValue.trim().toLowerCase();

    if (this.dataSource.paginator) {
      this.dataSource.paginator.firstPage();
    }
  }

  deleteEmployee(id: number) {
    let confirm = window.confirm(
      "Are you sure you want to delete this employee?"
    );

    if (confirm) {
      this.empService.deleteEmployee(id).subscribe({
        next: (res) => {
          alert("Employee deleted!");

          this.getEmployeeList();
        },

        error: (err) => {
          console.log(err);
        },
      });
    }
  }

  openEditForm(data: any) {
    const dialogRef = this.dialog.open(EmpAddEditComponent, {
      data,
    });

    dialogRef.afterClosed().subscribe({
      next: (val) => {
        if (val) {
          this.getEmployeeList();
        }
      },
    });
  }
}
What’s happening here?
- First, you’re importing the components needed for this - Importing `app.component.html`` from the Material UI library.
- Initiating some properties like
displayedColumnsanddataSourcefor themat-tablecomponent. - And at last, you’ve created some methods like
openAddEditEmployeeDialog(),getEmployeeList(),applyFilter(),deleteEmployee(),openEditForm(). Some of these methods are created in theapp.component.htmlfile to open the dialog, delete an employee, update an employee, or filter the table.
Importing Material UI Modules
Now that the app component is complete, if you try to view the app, you will get a bunch of errors. And why is that? Because you still didn’t import all those modules from the material ui library in the app.module.ts file. So, now let’s add the following code to the app.module.ts file:
import { NgModule } from "@angular/core";
import { BrowserModule } from "@angular/platform-browser";
import { AppRoutingModule } from "./app-routing.module";
import { AppComponent } from "./app.component";
import { BrowserAnimationsModule } from "@angular/platform-browser/animations";
import { MatToolbarModule } from "@angular/material/toolbar";
import { MatIconModule } from "@angular/material/icon";
import { MatButtonModule } from "@angular/material/button";
import { EmpAddEditComponent } from "./emp-add-edit/emp-add-edit.component";
import { MatDialogModule } from "@angular/material/dialog";
import { MatFormFieldModule } from "@angular/material/form-field";
import { MatInputModule } from "@angular/material/input";
import { MatDatepickerModule } from "@angular/material/datepicker";
import { MatNativeDateModule } from "@angular/material/core";
import { MatRadioModule } from "@angular/material/radio";
import { MatSelectModule } from "@angular/material/select";
import { ReactiveFormsModule } from "@angular/forms";
import { HttpClientModule } from "@angular/common/http";
import { MatTableModule } from "@angular/material/table";
import { MatPaginatorModule } from "@angular/material/paginator";
import { MatSortModule } from "@angular/material/sort";

@NgModule({
  declarations: [AppComponent, EmpAddEditComponent],

  imports: [
    BrowserModule,
    AppRoutingModule,
    BrowserAnimationsModule,
    MatToolbarModule,
    MatIconModule,
    MatButtonModule,
    MatDialogModule,
    MatFormFieldModule,
    MatInputModule,
    MatDatepickerModule,
    MatNativeDateModule,
    MatRadioModule,
    MatSelectModule,
    ReactiveFormsModule,
    HttpClientModule,
    MatTableModule,
    MatPaginatorModule,
    MatSortModule,
  ],

  providers: [],
  bootstrap: [AppComponent],
})
export class AppModule {}
It’s time to prepare the emp-add-edit component. We will first prepare the emp-add-edit.component.html. Open the emp-add-edit.component.html file and paste the following code:
<div mat-dialog-title>
    <h1>{{data ? 'Edit': 'Add'}} Employee Form</h1>
</div>

<form [formGroup]="empForm" (ngSubmit)="onSubmit()">
    <div mat-dialog-content class="content">
        <div class="row">
            <mat-form-field appearance="outline">
                <mat-label>First name:</mat-label>

                <input matInput type="text" placeholder="i.e David" formControlName="firstName" />
            </mat-form-field>

            <mat-form-field appearance="outline">
                <mat-label>Last Name:</mat-label>

                <input matInput placeholder="i.e Smith" formControlName="lastName" />
            </mat-form-field>
        </div>

        <div class="row">
            <mat-form-field appearance="outline">
                <mat-label>Email:</mat-label>

                <input matInput type="email" placeholder="i.e david@gmail.com" formControlName="email" />
            </mat-form-field>

            <mat-form-field appearance="outline">
                <mat-label>Date of birth:</mat-label>

                <input matInput [matDatepicker]="picker" formControlName="dob" />

                <mat-hint>MM/DD/YYYY</mat-hint>

                <mat-datepicker-toggle matIconSuffix [for]="picker"></mat-datepicker-toggle>

                <mat-datepicker #picker></mat-datepicker>
            </mat-form-field>
        </div>

        <div class="row">
            <mat-radio-group aria-label="Select an option" formControlName="gender">
                <mat-label><b>Gender:</b></mat-label>

                <mat-radio-button value="male">Male</mat-radio-button>

                <mat-radio-button value="female">Female</mat-radio-button>

                <mat-radio-button value="others">Others</mat-radio-button>

                <mat-radio-button value="others">Not Interested</mat-radio-button>
            </mat-radio-group>
        </div>

        <div class="row">
            <mat-form-field appearance="outline">
                <mat-label>Education:</mat-label>

                <mat-select formControlName="education">
                    <mat-option *ngFor="let val of education" [value]="val">{{val}}
                    </mat-option>
                </mat-select>
            </mat-form-field>

            <mat-form-field appearance="outline">
                <mat-label>Company:</mat-label>

                <input matInput placeholder="i.e Amazon" formControlName="company" />
            </mat-form-field>
        </div>

        <div class="row">
            <mat-form-field appearance="outline">
                <mat-label>Experience:</mat-label>

                <input matInput placeholder="i.e 5" type="number" formControlName="experience" />
            </mat-form-field>

            <mat-form-field appearance="outline">
                <mat-label>Salary:</mat-label>

                <input matInput placeholder="i.e 15" type="number" formControlName="salary" />

                <mat-hint>In dollar</mat-hint>
            </mat-form-field>
        </div>
    </div>

    <div mat-dialog-actions class="action-btns">
        <button style="margin: 10px" mat-raised-button color="accent" type="submit">
            {{data ? 'Update': 'Save'}}
        </button>

        <button mat-raised-button type="button" color="warn" [mat-dialog-close]="false">
            Cancel
        </button>
    </div>
</form>
Here you’re creating the dialog for adding and editing an employee. You created the input field, such as first name, last name, gender, etc. For adding a new employee to our list. If you click on the edit button in the table, then this dialog will open with the previous value, and change the update button, the new value will be saved. You can also cancel editing. Now to make our dialog look more awesome, paste the following code in the emp-add-edit.component.css file:
.row {
  display: flex;

  justify-content: space-between;

  gap: 20px;

  margin-bottom: 10px;
}

mat-form-field {
  width: 100%;
}

mat-hint {
  margin: 5px;
}

.action-btns {
  float: right;

  margin-right: 10px;
}

.action-btns button {
  padding: 20px;
}
Now let’s add the logic of creating and updating an employee in the emp-add-edit.component.ts by pasting the following code:
import { Component, Inject, OnInit } from "@angular/core";
import { FormBuilder, FormGroup, Validators } from "@angular/forms";
import { MatDialogRef, MAT_DIALOG_DATA } from "@angular/material/dialog";
import { EmployeeService } from "../employee.service";

@Component({
  selector: "app-emp-add-edit",
  templateUrl: "./emp-add-edit.component.html",
  styleUrls: ["./emp-add-edit.component.css"],
})
export class EmpAddEditComponent implements OnInit {
  empForm: FormGroup;

  education: string[] = [
    "Matric",
    "Diploma",
    "Intermediate",
    "Graduate",
    "Post Graduate",
  ];

  constructor(
    private empService: EmployeeService,
    private dialogRef: MatDialogRef<EmpAddEditComponent>,
    private formBuilder: FormBuilder,

    @Inject(MAT_DIALOG_DATA) public data: any
  ) {
    this.empForm = this.formBuilder.group({
      firstName: ["", Validators.required],
      lastName: ["", Validators.required],
      email: ["", Validators.required],
      dob: ["", Validators.required],
      gender: ["", Validators.required],
      education: ["", Validators.required],
      company: ["", Validators.required],
      experience: ["", Validators.required],
      salary: ["", Validators.required],
    });
  }

  ngOnInit(): void {
    this.empForm.patchValue(this.data);
  }

  onSubmit() {
    if (this.empForm.valid) {
      if (this.data) {
        this.empService
          .updateEmployee(this.data.id, this.empForm.value)
          .subscribe({
            next: (val: any) => {
              alert("Employee details updated!");

              this.dialogRef.close(true);
            },

            error: (err: any) => {
              console.error(err);

              alert("Error while updating the employee!");
            },
          });
      } else {
        this.empService.addEmployee(this.empForm.value).subscribe({
          next: (val: any) => {
            alert("Employee added successfully!");
            this.empForm.reset();
            this.dialogRef.close(true);
          },

          error: (err: any) => {
            console.error(err);
            alert("Error while adding the employee!");
          },
        });
      }
    }
  }
}
Here, you are collecting the input values using the FormBuilder modules and ensuring the required inputs are given using the Validators module. When the user clicks on the update or saves button (if you’ve noticed, we used conditional rendering in the HTML template to show update or save depending on the data property), an existing employee will update, or a new employee will be added to our table.
Testing the CRUD Angular Material UI App
Finally, the app is ready to be explored! So visit http://localhost:4200 and try to create, update and delete an employee.
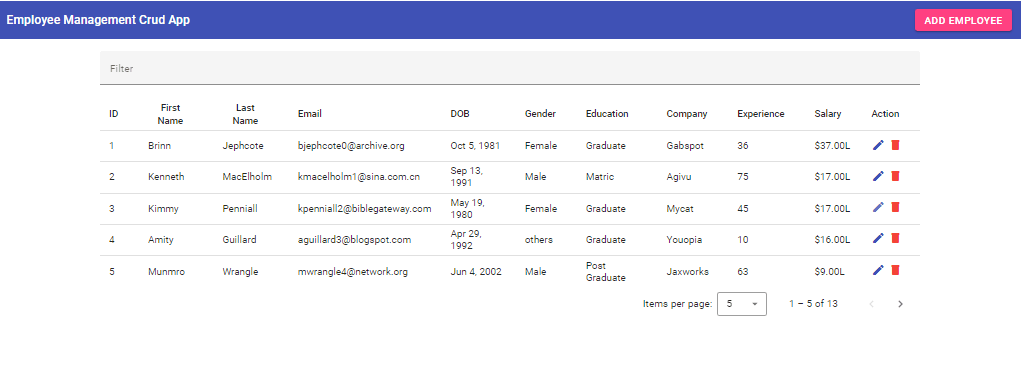
The CRUD Angular Material UI App will look like the follows:
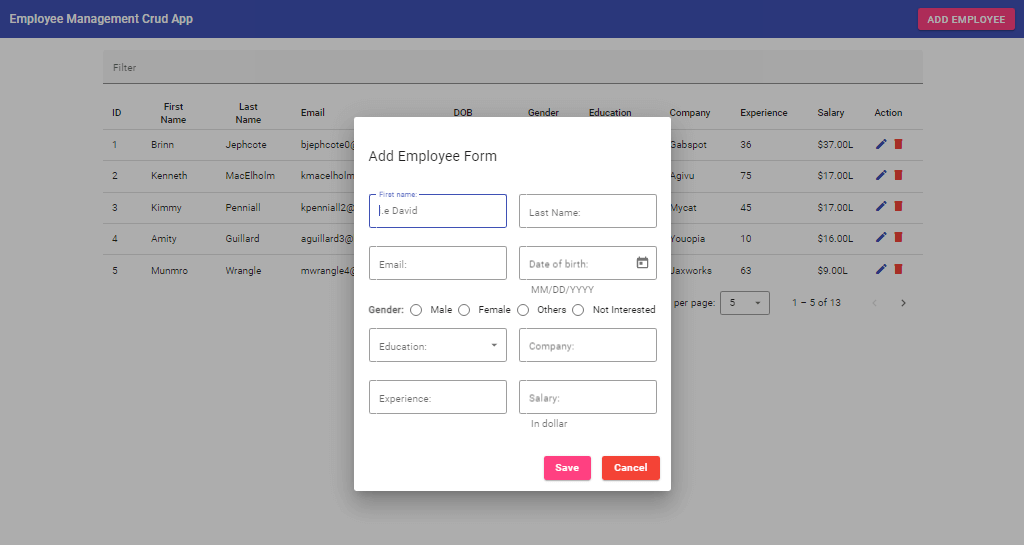
When the ADD EMPLOYEE button is clicked, a dialog will show up with a form to add a new employee, like the following image:
You can filter, sort, edit, delete an employee, and use pagination.
If you want to get the complete source code of this simple employee management crud app, download it from my GitLab repo here.
Additionally, visit https://material.angular.io to get the code you need to use mat-table, mat-paginator, etc.
Wrap Up
Building a CRUD app using Angular is very straightforward and fun. Breaking down the app into smaller components and services makes it a lot easier to manage the code and add new features so easily in the future.
Angular provides a lot of built-in functionality right out of the box that helps you to implement CRUD operations in a few lines of code. You can integrate this app with a real database without changing the source code.
I hope this tutorial has helped introduce you to Angular, Material UI, and JSON-Server. Good luck with your next Angular project!
More Related Articles:
-

How to Create reCAPTCHA V2 With Google Captcha and React
CAPTCHA (Completely Automated Public) is a challenge-response test used to determine whether or not a user is human or a bot. CAPTCHAs are used as a
Aug 23, 2023
-

The Complete Guide to Creating Flask APIs with React apps
Integrating a Flask with a React involves setting up communication between the two using HTTP requests to send and receive data. You will create a
Jul 31, 2023
-

A Comprehensive Guide to Vue.js State Management using Pinia
State management provides more straightforward ways for managing the data of your application. This concept is not limited to the most popular web
Jul 20, 2023