The Complete Guide to Creating Flask APIs with React apps
Posted July 31, 2023

Integrating a Flask with a React involves setting up communication between the two using HTTP requests to send and receive data. You will create a Flask application that saves data in a MySQL and expose a CRUD API.
The React frontend will send requests to the Flask API endpoints to retrieve and interact with the data using Axios. Therefore, you must have Python, Node and MySQL readily installed on your computer.
Set up a Flask backend server
To get started, you need to set up a Flask backend server. You can do this using the Flask package and creating a new Flask application. First, let’s create the database that the application will use.
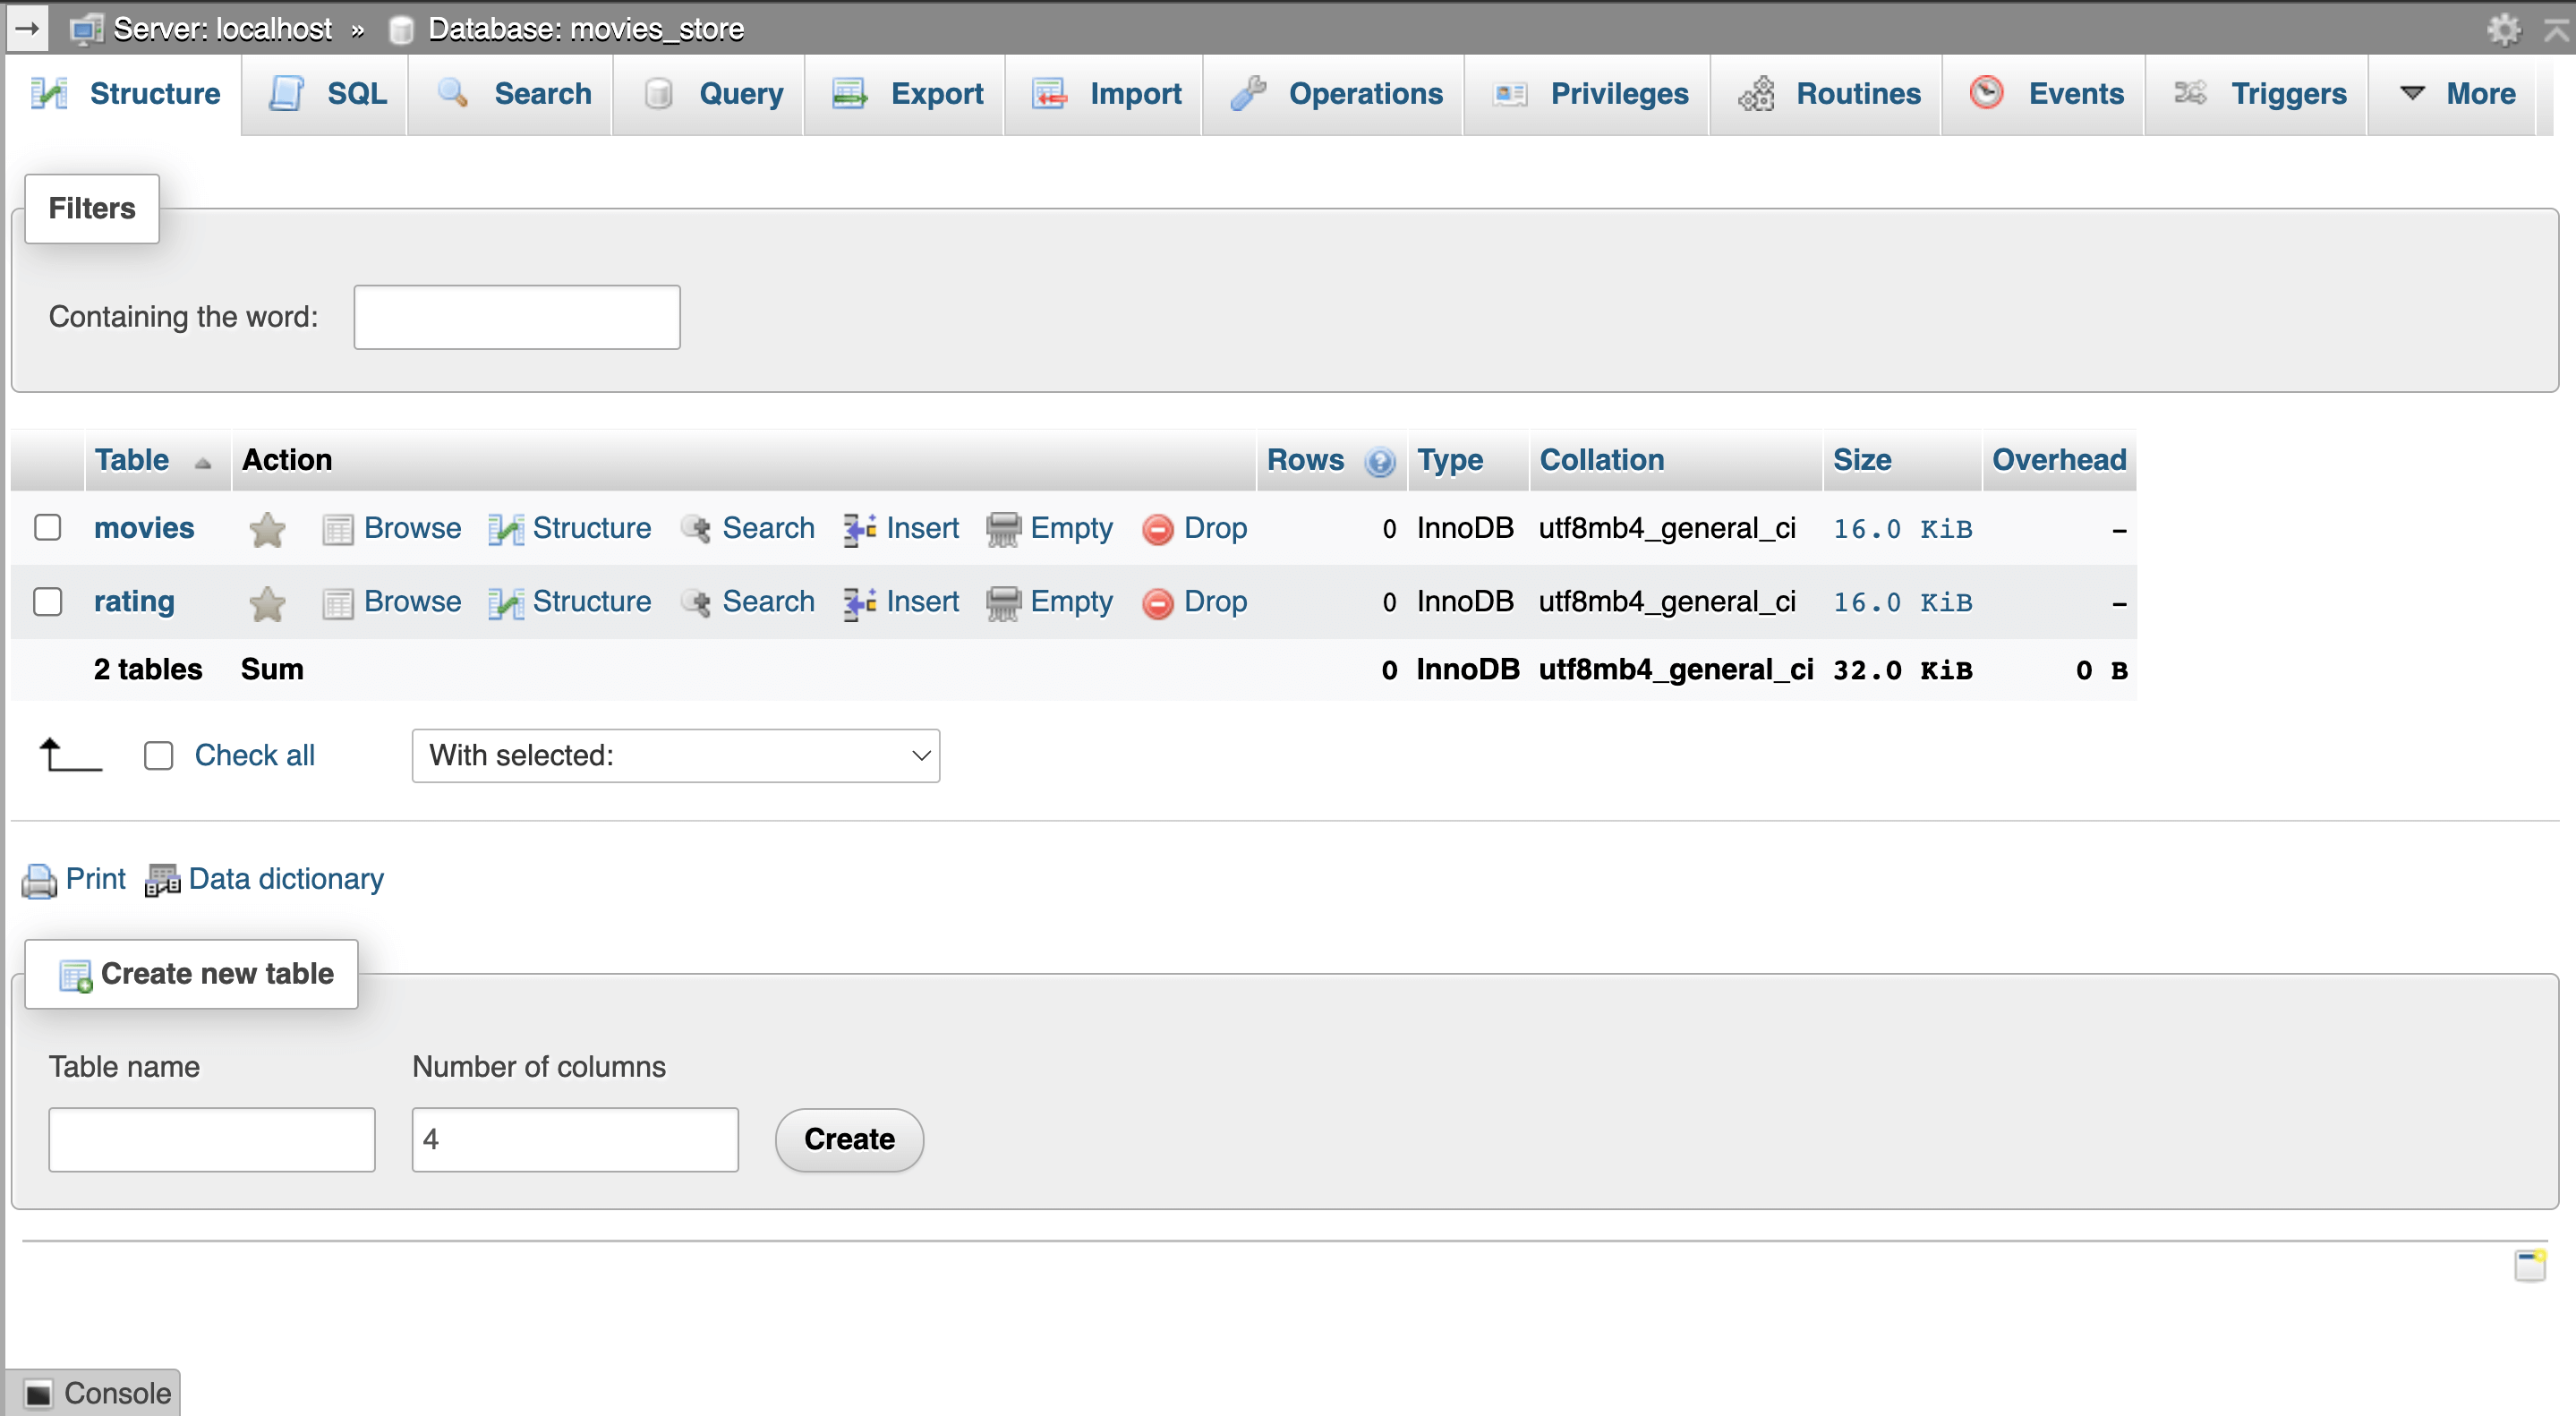
You will use the MySQL database to store the movie data. The database will host two database tables: movies for storing the movie information and rating for storing individual movie rating entries.
Ensure you have a database for this article:
CREATE DATABASE `movies_store`;
Then inside the movies_store database, create two tables: rating and movies:
You will use the following SQL query to create the movies table for storing the movies.
CREATE TABLE movies(
    id int not null primary key auto_increment,
    title text not null,
    avatar text not null,
    description text not null
);
Use the following SQL query to create the rating table storing the rating of the movies.
CREATE TABLE rating(
    id int not null primary key auto_increment,
    movie_id int not null,
    rating int not null
);
Before creating the Flask app, you need to create a working folder for the project. With that, you can use the Python pip command to install Flask and other required packages. You need the following packages:
- Flask - This is the package you need to write Flask Python-related code.
- Flask_cors - Flask API and React client runs on different ports. Thus, you need to allow Cross Origin Resource sharing to allow the two to communicate.
- Pymysql - This will allow you to create database connectors to communicate with the database you have created above.
Open a terminal that points to the created working directory and install the required dependencies:
pip install flask flask_cors pymysql
To create the API, you need to set up a Flask backend server by creating new Flask application files. On the root folder, create three files:
app.py: For initializing and starting up the Flask application and exposing it for CORS:
from flask import Flask
from flask_cors import CORS, cross_origin

app = Flask(__name__)
CORS(app)

# Add the route methods here

# Add routes implementation here

# Define a function to run the application

if __name__ == "__main__":
    app.run(debug=True)
config.py: For holding the database configurations for MySQL connection.
from app import app
from flaskext.mysql import MySQL

# the database configurations:
app.config['MYSQL_DATABASE_USER'] = 'your_database_username'
app.config['MYSQL_DATABASE_PASSWORD'] = 'your_database_password'
app.config['MYSQL_DATABASE_DB'] = 'name_of_your_database'
app.config['MYSQL_DATABASE_HOST'] = 'localhost'

# Iniatialize mysql
mysql = MySQL(app)
Ensure you replace the above configurations based on your MySQL database credentials.
main.py: For holding the routes configuration.
You will implement these steps in the following sections.
Setting up REST API endpoints
Endpoints are URLs that the React front-end will use to interact with the backend and the database data. In Flask, @app.route helps you achieve this.
For this guide, you will create an API to handle the CRUD operation. This means you have to create an API route for each method.
Creating a route for adding a movie
To add movie data to a database, you send a payload of data as a request to the server. The Flask server will then execute an INSERT SQL command to add the data payload to the database. To do that, create a route that executes a POST request as follows:
First, add the necessary dependencies that will let the application communicate with the database and the request you are sending. This will include the following dependencies:
pymysql- The MySQL library for connecting to a MySQL database and executing SQL queries.flashAllow you to access the Flask objects that contains the methods for handling server incoming HTTP requests.app- The Flask application.mysql- Contains the MySQL configuration for your app.jsonify- Converts raw data to a JSON string.
In your previous main.py import these dependencies as follows:
import pymysql
from app import app
from config import mysql
from flask import jsonify
from flask import flash, request
Go ahead and define a route for creating a movie:
@app.route('/create', methods=['POST'])
To execute the above route, implement a create_movie() function to handle the POST requests:
def create_movie():
    try: # Get the Payload Data
        _json = request.json
        _avatar = _json['avatar']
        _title = _json['title']
        _description = _json['description']
        if _avatar and _title and _description and request.method == 'POST': # Check if all required fields are in payload
            conn = mysql.connect()	 # connect to DB
            cursor = conn.cursor(pymysql.cursors.DictCursor)
            sqlQuery = "INSERT INTO movies(avatar, title, description) VALUES(%s, %s, %s)"
            bindData = (_avatar, _title, _description)
            cursor.execute(sqlQuery, bindData)
            conn.commit() # insert the record
            response = jsonify({
                'success':True,
                'message':"Movie Added Successfully",
                'data':_cursor.lastrowid
            })
            response.status_code = 200
            return response # send a response
        else:
            return jsonify({
                'success':False,
                'message':'Avatar, title, and description are required'
            })
    except Exception as e:
        response = jsonify({
            'success':False,
            'message':e
        })
        response.status_code = 500
        return response # send an error response
    finally:
        cursor.close()
        conn.close()
In this case:
- You are creating a single API
/createendpoint with a POST HTTP method. - Flask will check the data you want to add and validate it with the required fields (
avatar,title, anddescription) in your payload. - Since the application is working with two tables, the
sqlQuery = "INSERT INTO movies(avatar, title, description) VALUES(%s, %s, %s)"will be executed to add movie ratings to the rating table. - If this check is passed, Flask will connect to the MySQL database using
mysql.connect(), and execute the movieINSERTqueries to insert a new movie record and ensure the transaction is saved usingconn.commit().
Creating a route for managing rating
On main.py define a route for adding rating. This will allows you add rating details to the rating table. First create the rating route as follows:
@app.route('/rating',methods=['POST'])
Define a function for handling the route:
def add_rating():
try: # Get the request data
    _json = request.json
    _movie_id = _json['movie_id']
    _rating = _json['rating']
    if _movie_id and _rating and request.method == 'POST': # check if all data is present
        conn = mysql.connect()
        cursor = conn.cursor(pymysql.cursors.DictCursor)
        sqlQuery = "INSERT INTO rating(movie_id,rating) VALUES(%s,%s)"
        bindData = (_movie_id,_rating)
        cursor.execute(sqlQuery, bindData)
        conn.commit() # insert the rating.
        response = jsonify({
            'success':True,
            'message':"Rating Added Successfully"
        })
        response.status_code = 200
        return response # return the response
    else:
        return jsonify({ # return error message
            'success':False,
            'message':"Movie ID and Rating are required"
        })
except Exception as e:
    response = jsonify({ # return exception
        'success':False,
        'message':e
    })
    response.status_code = 500
    return response
finally:
    cursor.close()
    conn.close()
Creating a route for fetching movies
A GET method fetches data from the database. The request sent will return the available movies as a response. To send a GET request, create a route that executes the GET method in the main.py file as follows:
@app.route('/movies',methods=['GET'])
Implement a function for handling the GET route as follows:
def movies():
    try:
        conn = mysql.connect() # Connect to the DB
        cursor = conn.cursor(pymysql.cursors.DictCursor)
        cursor.execute("SELECT movies.id, avatar, title, description,rating.rating as rating FROM movies LEFT JOIN rating ON rating.movie_id = movies.id") # Get the movies and their ratings
        movieRows = cursor.fetchall()
        response = jsonify({
            'success':True,
            'message':'Movies Fetched Successfully',
            'data':movieRows
        })
        response.status_code = 200
        return response # send a response
    except Exception as e:
        response = jsonify({
            'success':False,
            'message':e
        })
        return response # send an error response
    finally:
        cursor.close()
        conn.close()
In this case:
mysql.connect()will establish a connection to the database using the settings from theconfig.pyfile.SELECT movies.id, avatar, title, description,rating.rating as rating FROM movies LEFT JOIN rating ON rating.movie_id = movies.id"SQL query select all movies and corresponding ratings from themoviesandratingtables.fetchall()will fetch returned data and store them in a variablemovieRows.jsonify()will return the data saved bymovieRowsin a JSON response object.
Let’s use the same approach to create a different route that gets the individual movie data. This will let you create dynamic React pages that access a specific movie based on its id. In this case, using the above approach, create a route for fetching a movie and implement it in your main.py as follows:
@app.route('/movies/<int:movie_id>')

def movie_details(movie_id):
    try:
        conn = mysql.connect() # Connect to the DB
        cursor = conn.cursor(pymysql.cursors.DictCursor)
        cursor.execute("SELECT movies.id, title, avatar, description, rating.rating FROM movies LEFT JOIN rating ON rating.movie_id = movies.id  WHERE movies.id =%s", movie_id) # Get the movie and it's rating
        movieRow = cursor.fetchone()
        response = jsonify({
            'success':True,
            'message':'Movie Fetched Successfully',
            'data':movieRow
        })
        respone.status_code = 200
        return response # send a response
    except Exception as e:
        response = jsonify({
            'success':False,
            'message':e
        })
        return response # send an error response
    finally:
        cursor.close()
        conn.close()
The SQL query has a clause WHERE movies.id =%s that fetches a single movie. The id parameter will be specified in the route parameter /movies/<int:movie_id as movie_id.
Creating a route for updating a movie
The PUT HTTP method is used to update an existing resource on a server. In this Flask API context, you create a PUT endpoint to handle requests to update movie data in the database.
To create a PUT endpoint to update a movie’s details, add a route for sending a request to update a movie in your main.py as follows:
@app.route('/update_movie', methods=['PUT'])
Then create a update_movie() function to handle the route:
def update_movie():
    try: # get the payload data
        _json = request.json
        _id = _json['id']
        _avatar = _json['avatar']
        _title = _json['title']
        _description = _json['description']
        _rating = _json['rating']
        if _avatar and _title and _description and _id and request.method == 'PUT': # ensure all fields are supplied
            sqlQuery = "UPDATE movies SET avatar=%s, title=%s, description=%s WHERE id=%s"
            bindData = (_avatar, _title, _description, _id,)
            conn = mysql.connect()
            cursor = conn.cursor()
            cursor.execute(sqlQuery, bindData)
            conn.commit() # update the movie details
            # check if we have rating sent in.
            if _rating:
                # check if we already have a rating for this movie.
                cursor.execute("SELECT id,movie_id,rating FROM rating WHERE movie_id=%s",_id)
                movie_rating = cursor.fetchone()
                if movie_rating:
                    # do an update of the rating.
                    sqlQuery = "UPDATE rating SET rating=%s WHERE movie_id=%s"
                    bindData = (_rating,_id,)
                    cursor.execute(sqlQuery, bindData)
                    conn.commit()
                else:
                    # do an insert
                    sqlQuery = "INSERT INTO rating(movie_id,rating) VALUES(%s,%s)"
                    bindData = (_id,_rating)
                    cursor.execute(sqlQuery, bindData)
                    conn.commit()

            response = jsonify({
                'success':True,
                'message':'Movie Updated Successfully'
            })
            response.status_code = 200
            return response # send a response
        else:
            return showMessage()
    except Exception as e:
        response = jsonify({
            'success':False,
            'message':e
        })
        return response # send an error response
    finally:
        cursor.close()
        conn.close()
In this case:
update_movie()handles movie data in the database based on the provided movieid.- The API gets the payload data from the request. If all required fields are there,
update_movie()updates the movie data in the database using theUPDATESQL query.
Creating a route for deleting a movie
The last method you need to execute to complete CRUD operations is DELETE. The DELETE method is used to request a resource be removed from the server. Below is how Flask will delete a movie resource from the database: Define a route for deleting a movie in the main.py file:
@app.route('/delete/<int:id>', methods=['DELETE'])
Create a delete_movie(id) function to handle the DELETE route as follows:
def delete_movie(id):
    try:
        conn = mysql.connect() # Connect to DB
        cursor = conn.cursor()
        cursor.execute("DELETE FROM movies WHERE id =%s", (id,))
        conn.commit() # Delete the record
        response = jsonify({
            'success':'True',
            'message':'Movie Deleted Successfully'
        })
        response.status_code = 200
        return response # send a response
    except Exception as e:
        print(e)
        response = jsonify({
            'success':False,
            'message':e
        })
        return response # send an error response
    finally:
        cursor.close()
        conn.close()
delete_movie()executes a request to delete a movie from the database based on the provided movie id.- The database executes the
DELETEquery to remove the movie that meets the provided id parameter.
Once you have all methods, start the Flask development server using the following command:
python main.py
You now implement a React client application to consume your API from this point.
React Flask configuration
To consume the API, you first need to create a React app. Run the following command to initialize a React application with Redux toolkit: Redux toolkit allows you to manage the predictable state of your React components.
npx create-react-app movies_app --template redux
Using the --template redux flag, React will be set up with the necessary dependencies for Redux for state management. Once the application is ready, proceed to the newly created movies_app directory:
cd movies_app
Additionally, install Material UI packages for managing the application UI and React Router for navigation.
npm install @mui/icons-material @mui/material react-router-dom
Now you need to configure React to consume the Flask API. To do this, install the Axios library. Axios allows you to make HTTP requests to an external API. Install Axios as follows:
npm install axios
To fetch the API data, on src/features, create a new directory, movie. Inside the movie directory, create movieAPI.js for executing all the methods and their respective connections to the server using the API endpoints as follows:
import axios from "axios"; // for sending HTTP requests

export async function fetchMovies() {
  // fetching movies
  try {
    let movies = await axios.get("http://127.0.0.1:5000/movies");
    return movies.data.data;
  } catch (error) {
    return [];
  }
}

export async function addMovie(data) {
  // adding a movie
  let response = await axios.post("http://127.0.0.1:5000/create", data, {
    headers: {
      "Content-Type": "application/json",
    },
  });
  return response.data;
}

export async function addRating(data){
    // adding a rating
    let response = await axios.post('http://127.0.0.1:5000/rating',data,{
        headers:{
            "Content-Type":"application/json"
        }
    });
    return response.data;
}

export async function updateMovie(data) {
  // updating a movie
  let response = await axios.put(`http://127.0.0.1:5000/update_movie`, data, {
    headers: {
      "Content-Type": "application/json",
    },
  });
  return response.data;
}

export async function getMovieById(id) {
  // fetching a single movie
  let response = await axios.get(`http://127.0.0.1:5000/movies/${id}`);
  return response.data;
}

export async function deleteMovie(id) {
  // deleting a movie
  let response = await axios.delete(`http://127.0.0.1:5000/delete/${id}`, {
    headers: {
      "Content-Type": "application/json",
    },
  });
  return response.data;
}
Setting up the client states
The application uses the Redux toolkit to manage the application state. It uses reducers to receive the action from the user and updates the state of the store accordingly as described by the user’s action. Create a movieSlice.js inside the src/features/movie folder for defining the movie reducer as follows:
Import Redux and define the initial state:
import { createSlice } from "@reduxjs/toolkit";

const initialState = {
  loading: false,
  status: "idle",
  movies: [],
  error: "",
};
This store will manage the movie data based on the following properties:
loading indicates whether the app is currently loading data.
status represents the app’s status, such as in idle, loading, succeeded, or failed states.
movies holds an array of movie objects. It is initially set to empty. If the app gets the movie data from the API, it will save the request response on this array.
error will be used to manage the state if the API returns an error based on the request the client has sent to the server.
Define the movieSlice function and implement the reducers for the above states to match their respective data representations as follows:
export const movieSlice = createSlice({
  name: "movie",
  initialState,
  reducers: {
    fetchMoviesState: async (state, action) => {
      state.loading = true;
    },
    fetchMoviesEnd: (state, action) => {
      state.loading = false;
      state.movies = action.payload;
    },
    fetchMoviesError: (state, action) => {
      state.loading = false;
      state.error = action.payload;
    },
    addMovieStart: async (state, action) => {
      state.loading = true;
    },
    addMovieEnd: (state, action) => {
      state.loading = false;
      state.error = action.payload;
    },
    deleteMovie: (state, action) => {
      state.loading = true;
      state.movies = state.movies.filter(
        (movie) => movie.id !== action.payload
      );
      state.loading = false;
    },
  },
});
- Define the function for selecting a movie:
export const selectMovie = (state) => state.movie;
The selectMovie function returns the movie state from the Redux store.
- Create the function for handling deleting a movie:
export const handleDeleteMovie = (id) => (dispatch, getState) => {
  dispatch(deleteMovie(id));
};
handleDeleteMovie dispatches the request action for the DELETE request to the server using deleteMovie . handleDeleteMovie will be used to dispatch actions based on the success or failure of this delete operation.
- Export the reducer functions so that you can access them:
export const {
  fetchMoviesState,
  fetchMoviesEnd,
  fetchMoviesError,
  addMovieStart,
  addMovieEnd,
  deleteMovie,
} = movieSlice.actions;
- Export the
movieSlicereducer:
export default movieSlice.reducer;
To use the reducer, on the src/app/store.js, import the movie slice:
import movieReducer from "../features/movie/movieSlice";
Then define the movie as a reducer in the store configuration function:
export const store = configureStore({
  reducer: {
    movie: movieReducer,
  },
});
Setting up the application components
For easier navigation around the application, navigate to the src directory and create a components directory. Inside the components directory, create a Navbar.js file. The file will host the application’s navigation bar, allowing the user to access pages such as for Adding a Movie as follows.
Import the packages and define the navigation menus.
import {
  AppBar,
  Box,
  Toolbar,
  Typography,
  IconButton,
  Button,
} from "@mui/material";
import MenuIcon from "@mui/icons-material/Menu";
Create the following items for the navigation menus:
const navItems = [
  {
    title: "Home",
    url: "/",
  },
  {
    title: "Add Movie",
    url: "/add_movie",
  },
];
Create a simple navigation bar and render the function for the Navbar as follows:
export default function NavBar() {
  return (
    <Box sx={{ flexGrow: 1 }}>
      <AppBar position="static">
        <Toolbar>
          <IconButton
            size="large"
            edge="start"
            color="inherit"
            aria-label="menu"
            sx={{ mr: 2 }}
          >
            <MenuIcon />
          </IconButton>
          <Typography variant="h6" component="div" sx={{ flexGrow: 1 }}>
            Movies App
          </Typography>
          <Box sx={{ display: { xs: "none", sm: "block" } }}>
            {navItems.map((item) => (
              <Button
                onClick={() => (window.location = item.url)}
                key={item}
                sx={{ color: "#fff" }}
              >
                {item.title}
              </Button>
            ))}
          </Box>
        </Toolbar>
      </AppBar>
    </Box>
  );
}
Showing the movies
Every API data is now available. It is time to build the UIs that let React interact with the server. First, let’s fetch the movie data. In the features/movie directory, create a Movie.js file. The file will fetch and show the movies.
- Import the necessary packages:
import React, { useEffect } from "react";
import { useSelector, useDispatch } from "react-redux";
import { selectMovie, fetchMoviesEnd, handleDeleteMovie } from "./movieSlice";
import { fetchMovies, deleteMovie } from "./movieAPI";
import Navbar from "../../components/Navbar";
import {
  Table,
  TableBody,
  TableCell,
  TableContainer,
  TableHead,
  TableRow,
  Paper,
  Button,
  Container,
  Box,
} from "@mui/material";
- Define the render function:
export function Movie() {}
- Get the state data and fetch the movies:
const { loading, error, movies } = useSelector(selectMovie);
const dispatch = useDispatch();
useEffect(() => {
  fetchMovies().then((response) => {
    dispatch(fetchMoviesEnd(response));
  });
}, [dispatch]);
- Show and display the movies using React as follows:
return (
<div>
<Navbar />
<Container>
{loading && <p>We are loading</p>}
{!loading && error && <p>An error occurred {error}</p>}
{!loading && !error && movies && (
<Box sx={{ m: 2 }}>
<TableContainer component={Paper}>
<Table sx={{ minWidth: 650 }} aria-label="simple table">
<TableHead>
<TableRow>
<TableCell>
<b>Avatar</b>
</TableCell>
<TableCell align="right">
<b>Title</b>
</TableCell>
<TableCell align="right">
<b>Description</b>
</TableCell>
<TableCell align="right">
<b>Rating</b>
</TableCell>
<TableCell align="right">
<b>Actions</b>
</TableCell>
</TableRow>
</TableHead>
<TableBody>
{movies.map((row, i) => (
<TableRow
key={i}
sx={{ "&:last-child td, &:last-child th": { border: 0 } }}
>
<TableCell component="th" scope="row">
<img
src={row.avatar}
alt={row.title}
style={{ width: "200px", height: "200px" }}
/>
</TableCell>
<TableCell align="right">{row.title}</TableCell>
<TableCell align="right">{row.description}</TableCell>
<TableCell align="right">
{row.rating ? row.rating : "0"}
</TableCell>
<TableCell align="right">
<Button
onClick={() =>
(window.location = `/view_movie/${row.id}`)
}
>
View More
</Button>{" "}
<Button
variant="outlined"
color="success"
onClick={() =>
(window.location = `/update_movie/${row.id}`)
}
>
Update
</Button>
<Button
variant="outlined"
color="error"
onClick={(e) => handleDelete(row.id, e)}
>
Delete
</Button>
</TableCell>
</TableRow>
))}
</TableBody>
</Table>
</TableContainer>
</Box>
)}
</Container>
</div>
);
Viewing a single movie
To get a single movie, navigate to src/features/movie and add a ViewMovie.js. The file will host the functionality of viewing a single movie.
- Import the necessary packages:
import React, { useEffect, useState } from "react";
import NavBar from "../../components/Navbar";
import {
  Container,
  Box,
  Card,
  CardContent,
  Typography,
  Alert,
} from "@mui/material";
import { getMovieById } from "./movieAPI";
import { useParams } from "react-router-dom";
- Define a render function:
export default function ViewMovie() {}
- Inside the render function, define the states:
const { id } = useParams();

const [title, setTitle] = useState("");
const [avatar, setAvatar] = useState("");
const [description, setDescription] = useState("");
const [rating, setRating] = useState("");

const [error, setError] = useState("");
const [loading, setLoading] = useState(false);
- Fetch the movie:
useEffect(() => {
  setLoading(true);
  getMovieById(id)
    .then((response) => {
      setTitle(response.data.title);
      setAvatar(response.data.avatar);
      setDescription(response.data.description);
      setRating(response.data.rating);
      setLoading(false);
    })
    .catch((error) => {
      setError("An error occurred, " + error);
      setLoading(false);
    });
}, [id]);
- Render the view:
return (
  <div>
    <NavBar />
    <Container>
      <Box sx={{ m: 2 }}>
        {loading && <p>Loading</p>}
        {!loading && error && <Alert severity="error">{error}</Alert>}
        {!loading && (
          <Card sx={{ minWidth: 275 }}>
            <CardContent>
              <Typography variant="h6" component="div">
                Title : {title}
              </Typography>
              <Typography variant="h6" component="div">
                Avatar :
              </Typography>
              <img src={avatar} alt={title} style={{ height: "400px" }} />
              <Typography variant="h6" component="div">
                Description : {description}
              </Typography>
              <Typography variant="h6" component="div">
                Rating : {rating ? rating : "0"}
              </Typography>
            </CardContent>
          </Card>
        )}
      </Box>
    </Container>
  </div>
);
Adding a movie
On features/movie, create an AddMovie.js file. The file will host the functionality of adding a movie.
- Import the necessary packages:
import React, { useState } from "react";
import { Container, Box, TextField, Button, Alert } from "@mui/material";
import Navbar from "../../components/Navbar";
import { addMovie } from "./movieAPI";
- Define a render function:
export default function AddMovie() {}
- Define the states:
const [avatar, setAvatar] = useState("");
const [title, setTitle] = useState("");
const [description, setDescription] = useState("");
const [rating,setRating] = useState("");
const [message, setMessage] = useState("");
const [formError, setFormError] = useState("");
- Define a function for handling form submission:
const handleSubmit = async e => {
    e.preventDefault();
    if(avatar && title && description){
        // check that all the fields are there.
        let response = await addMovie({
            avatar,
            title,
            description
        });
        if(response.success){
            let result = await addRating({
                rating,
                movie_id:response.data
            });
            if(result.success){
                setMessage("Movie And Rating Added Successfully");
                setAvatar('');
                setTitle('');
                setDescription('');
                setRating('');
                setFormError('');
            }else{
                setMessage('');
                setAvatar('');
                setTitle('');
                setDescription('');
                setRating('');
                setFormError('Movie Added But Error Adding Rating');
            }
        }else{
            setFormError(response.message)
        }
    }else{
        setFormError("All fields are required");
        return;
    }
}
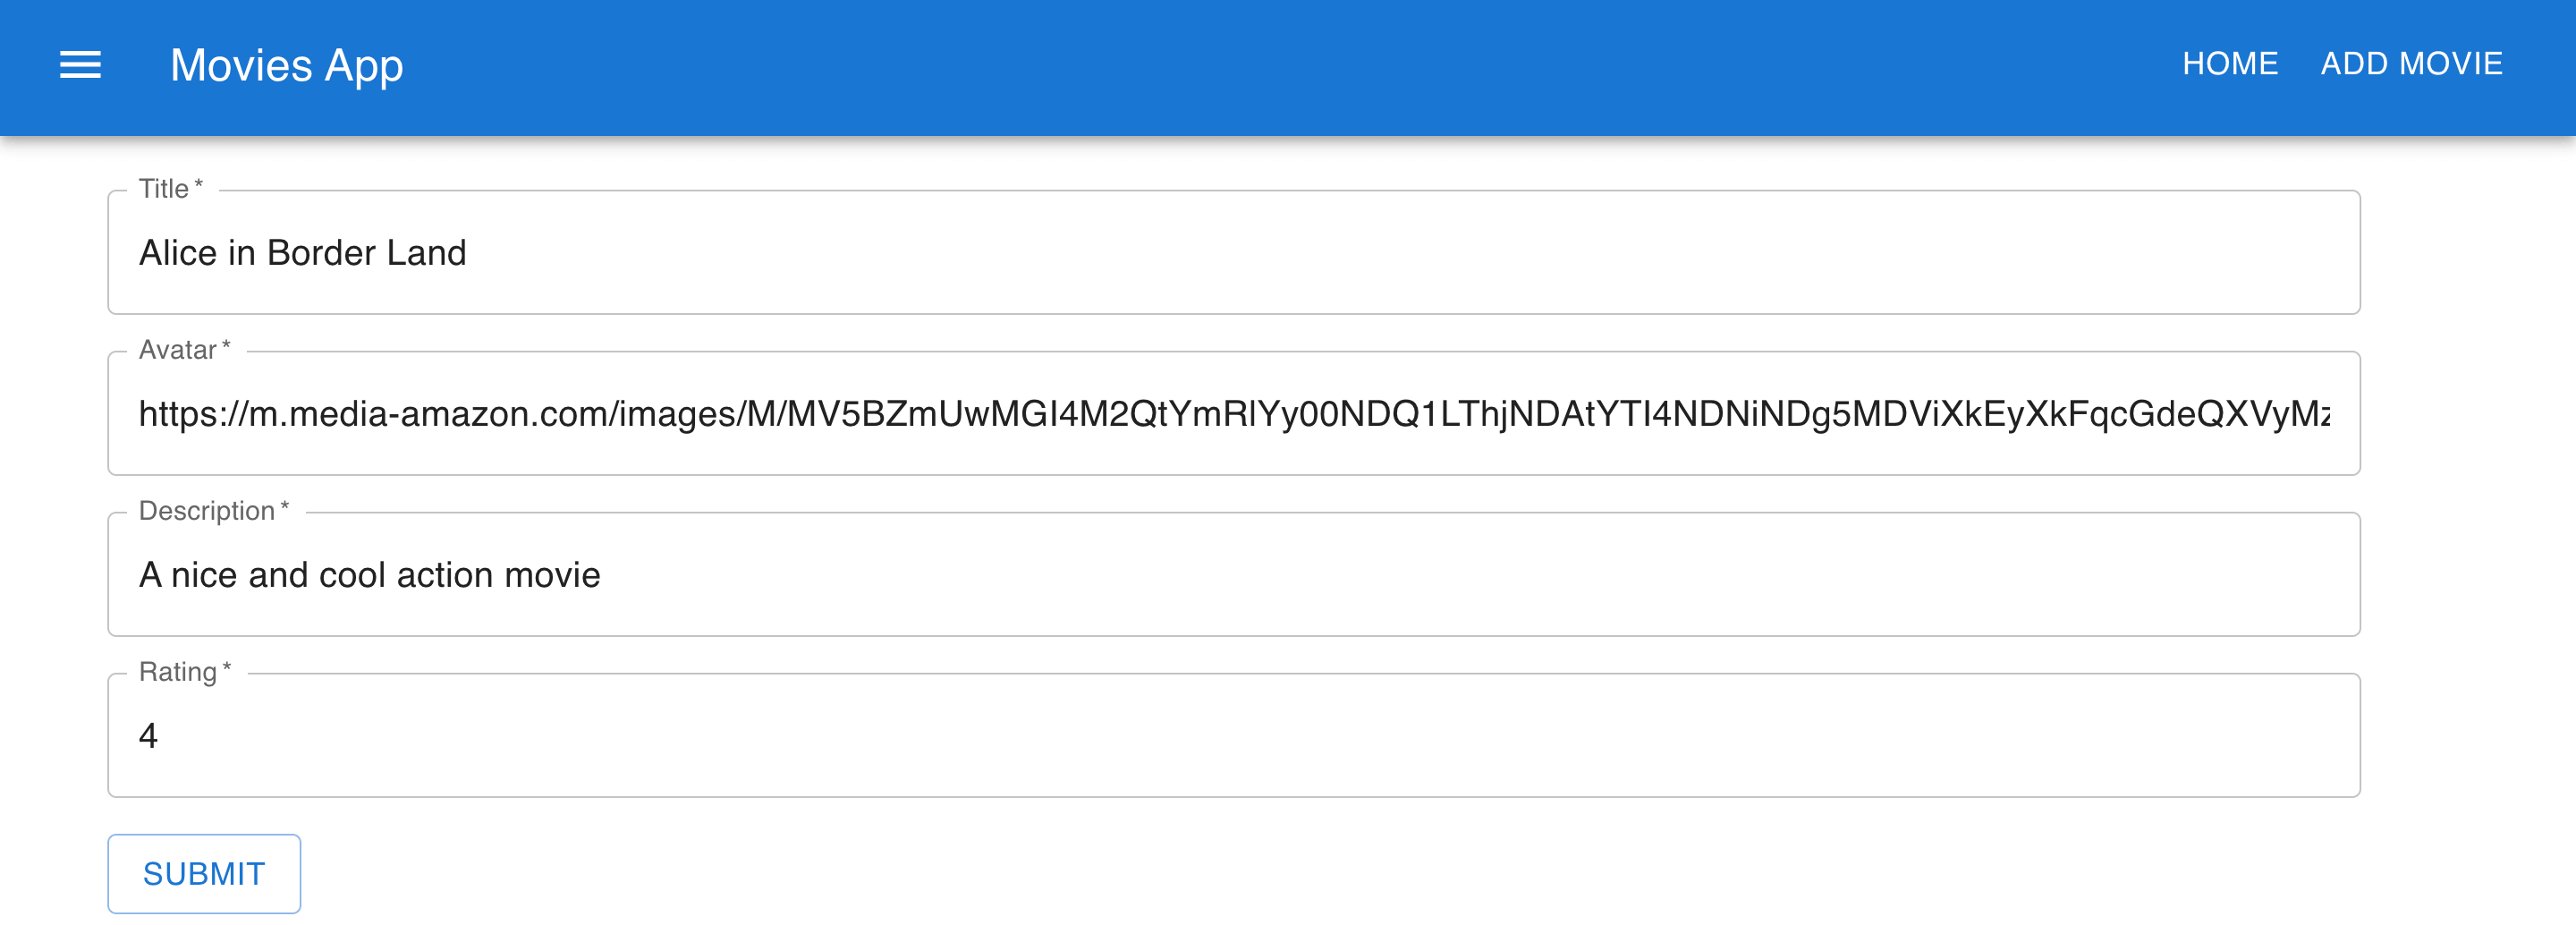
This includes the data you want to submit and save to the database. In this case, the movie avatar, title, description, and each movie rating value. Below is the form that will be used to submit this data look like.
- Render a form for the inputs as follows:
return (
  <div>
    <Navbar />
    <Container>
      <Box sx={{ m: 2 }}>
        <form onSubmit={handleSubmit}>
          <Box
            sx={{
              "& .MuiTextField-root": { m: 1, width: "100ch" },
            }}
          >
            <div>
              {formError && <Alert severity="error">{formError}</Alert>}
              {message && <Alert severity="success">{message}</Alert>}
              <TextField
                required
                id="title"
                label="Title"
                placeholder="Movie Title"
                value={title}
                onChange={(e) => setTitle(e.target.value)}
              />

              <TextField
                required
                id="avatar"
                label="Avatar"
                placeholder="Movie Avatar"
                value={avatar}
                onChange={(e) => setAvatar(e.target.value)}
              />

              <TextField
                required
                id="description"
                label="Description"
                placeholder="Movie Description"
                value={description}
                onChange={(e) => setDescription(e.target.value)}
              />

              <TextField
                required
                  id="rating"
                  label="Rating"
                  placeholder="Movie Rating"
                  value={rating}
                  onChange={e => setRating(e.target.value)}
              />
            </div>
          </Box>
          <Box sx={{ m: 1 }}>
            <Button type="submit" variant="outlined">
              Submit
            </Button>
          </Box>
        </form>
      </Box>
    </Container>
  </div>
);
Updating a movie
On src/features/movie create an UpdateMovie.js file. The file will host the functionality of updating a movie. Import the necessary packages:
import React, { useState, useEffect } from "react";
import Navbar from "../../components/Navbar";
import { Container, Box, Alert, TextField, Button } from "@mui/material";
import { useParams } from "react-router-dom";
import { getMovieById, updateMovie } from "./movieAPI";
- Define a render function:
export default function UpdateMovie() {}
- Inside the render function, define the states:
const { id } = useParams();
const [title, setTitle] = useState();
const [description, setDescription] = useState();
const [avatar, setAvatar] = useState();
const [rating, setRating] = useState();
const [formError, setFormError] = useState("");
const [message, setMessage] = useState("");
const [loading, setLoading] = useState(false);
- Inside the render function, get the movie to be updated:
useEffect(() => {
  setLoading(true);
  // get the movie with id
  getMovieById(id).then((response) => {
    if (response.success) {
      setAvatar(response.data.avatar);
      setTitle(response.data.title);
      setDescription(response.data.description);
      setRating(response.data.rating ? response.data.rating : "0");
      setLoading(false);
    } else {
      setFormError("No movie exists with that id");
      setLoading(false);
    }
  });
}, [id]);
- Define a function for handling the update once the form is submitted:
const handleSubmit = async (e) => {
  e.preventDefault();
  if (title && description && avatar && rating) {
    let response = await updateMovie({
      id,
      title,
      description,
      avatar,
      rating,
    });
    if (response.success) {
      setMessage("Movie Updated Successfully");
      return;
    } else {
      setFormError(response.message);
      return;
    }
  } else {
    setFormError("Title, Description, and Avatar are required");
    return;
  }
};
- Render the form to React as follows:
return (
  <div>
    <Navbar />
    <Container>
      <Box sx={{ m: 2 }}>
        {loading && <p>Loading</p>}
        {!loading && (
          <form onSubmit={handleSubmit}>
            <Box
              sx={{
                "& .MuiTextField-root": { m: 1, width: "100ch" },
              }}
            >
              <div>
                {formError && <Alert severity="error">{formError}</Alert>}
                {message && <Alert severity="success">{message}</Alert>}
                <TextField
                  required
                  id="title"
                  label="Title"
                  value={title}
                  onChange={(e) => setTitle(e.target.value)}
                />

                <TextField
                  required
                  id="avatar"
                  label="Avatar"
                  value={avatar}
                  onChange={(e) => setAvatar(e.target.value)}
                />

                <TextField
                  required
                  id="description"
                  label="Description"
                  value={description}
                  onChange={(e) => setDescription(e.target.value)}
                />

                <TextField
                  required
                  id="rating"
                  label="Rating"
                  value={rating}
                  onChange={(e) => setRating(e.target.value)}
                />
              </div>
            </Box>
            <Box sx={{ m: 1 }}>
              <Button type="submit" variant="outlined">
                Submit
              </Button>
            </Box>
          </form>
        )}
      </Box>
    </Container>
  </div>
);
Deleting a movie
On src/features/movie/Movie.js inside the render function, define a function for deleting a movie:
const handleDelete = async (id, e) => {
  e.target.innerText = "Deleting";
  let response = await deleteMovie(id);
  if (response.success) {
    dispatch(handleDeleteMovie(id));
  } else {
    return;
  }
};
Routing the pages
To connect the application pages, use the React router to organize the pages. Update your App.js as below to show the movies pages:
import React from "react";
import { Movie } from "./features/movie/Movie";
import "./App.css";

function App() {
  return (
    <div className="App">
      <Movie />
    </div>
  );
}

export default App;
- On
index.jsfile, import the router package and the different movie pages you have created as follows:
import { createBrowserRouter, RouterProvider } from "react-router-dom";
import AddMovie from "./features/movie/AddMovie";
import UpdateMovie from "./features/movie/UpdateMovie";
import ViewMovie from "./features/movie/ViewMovie";
- Define the routes for the router:
const router = createBrowserRouter([
  {
    path: "/",
    element: <App />,
  },
  {
    path: "/add_movie",
    element: <AddMovie />,
  },
  {
    path: "/view_movie/:id",
    element: <ViewMovie />,
  },
  {
    path: "/update_movie/:id",
    element: <UpdateMovie />,
  },
]);
- On the render function, define a router provider and supply the routes defined above:
root.render(
  <React.StrictMode>
    <Provider store={store}>
      <RouterProvider router={router} />
    </Provider>
  </React.StrictMode>
);
At this point, start the React application development server:
npm run start
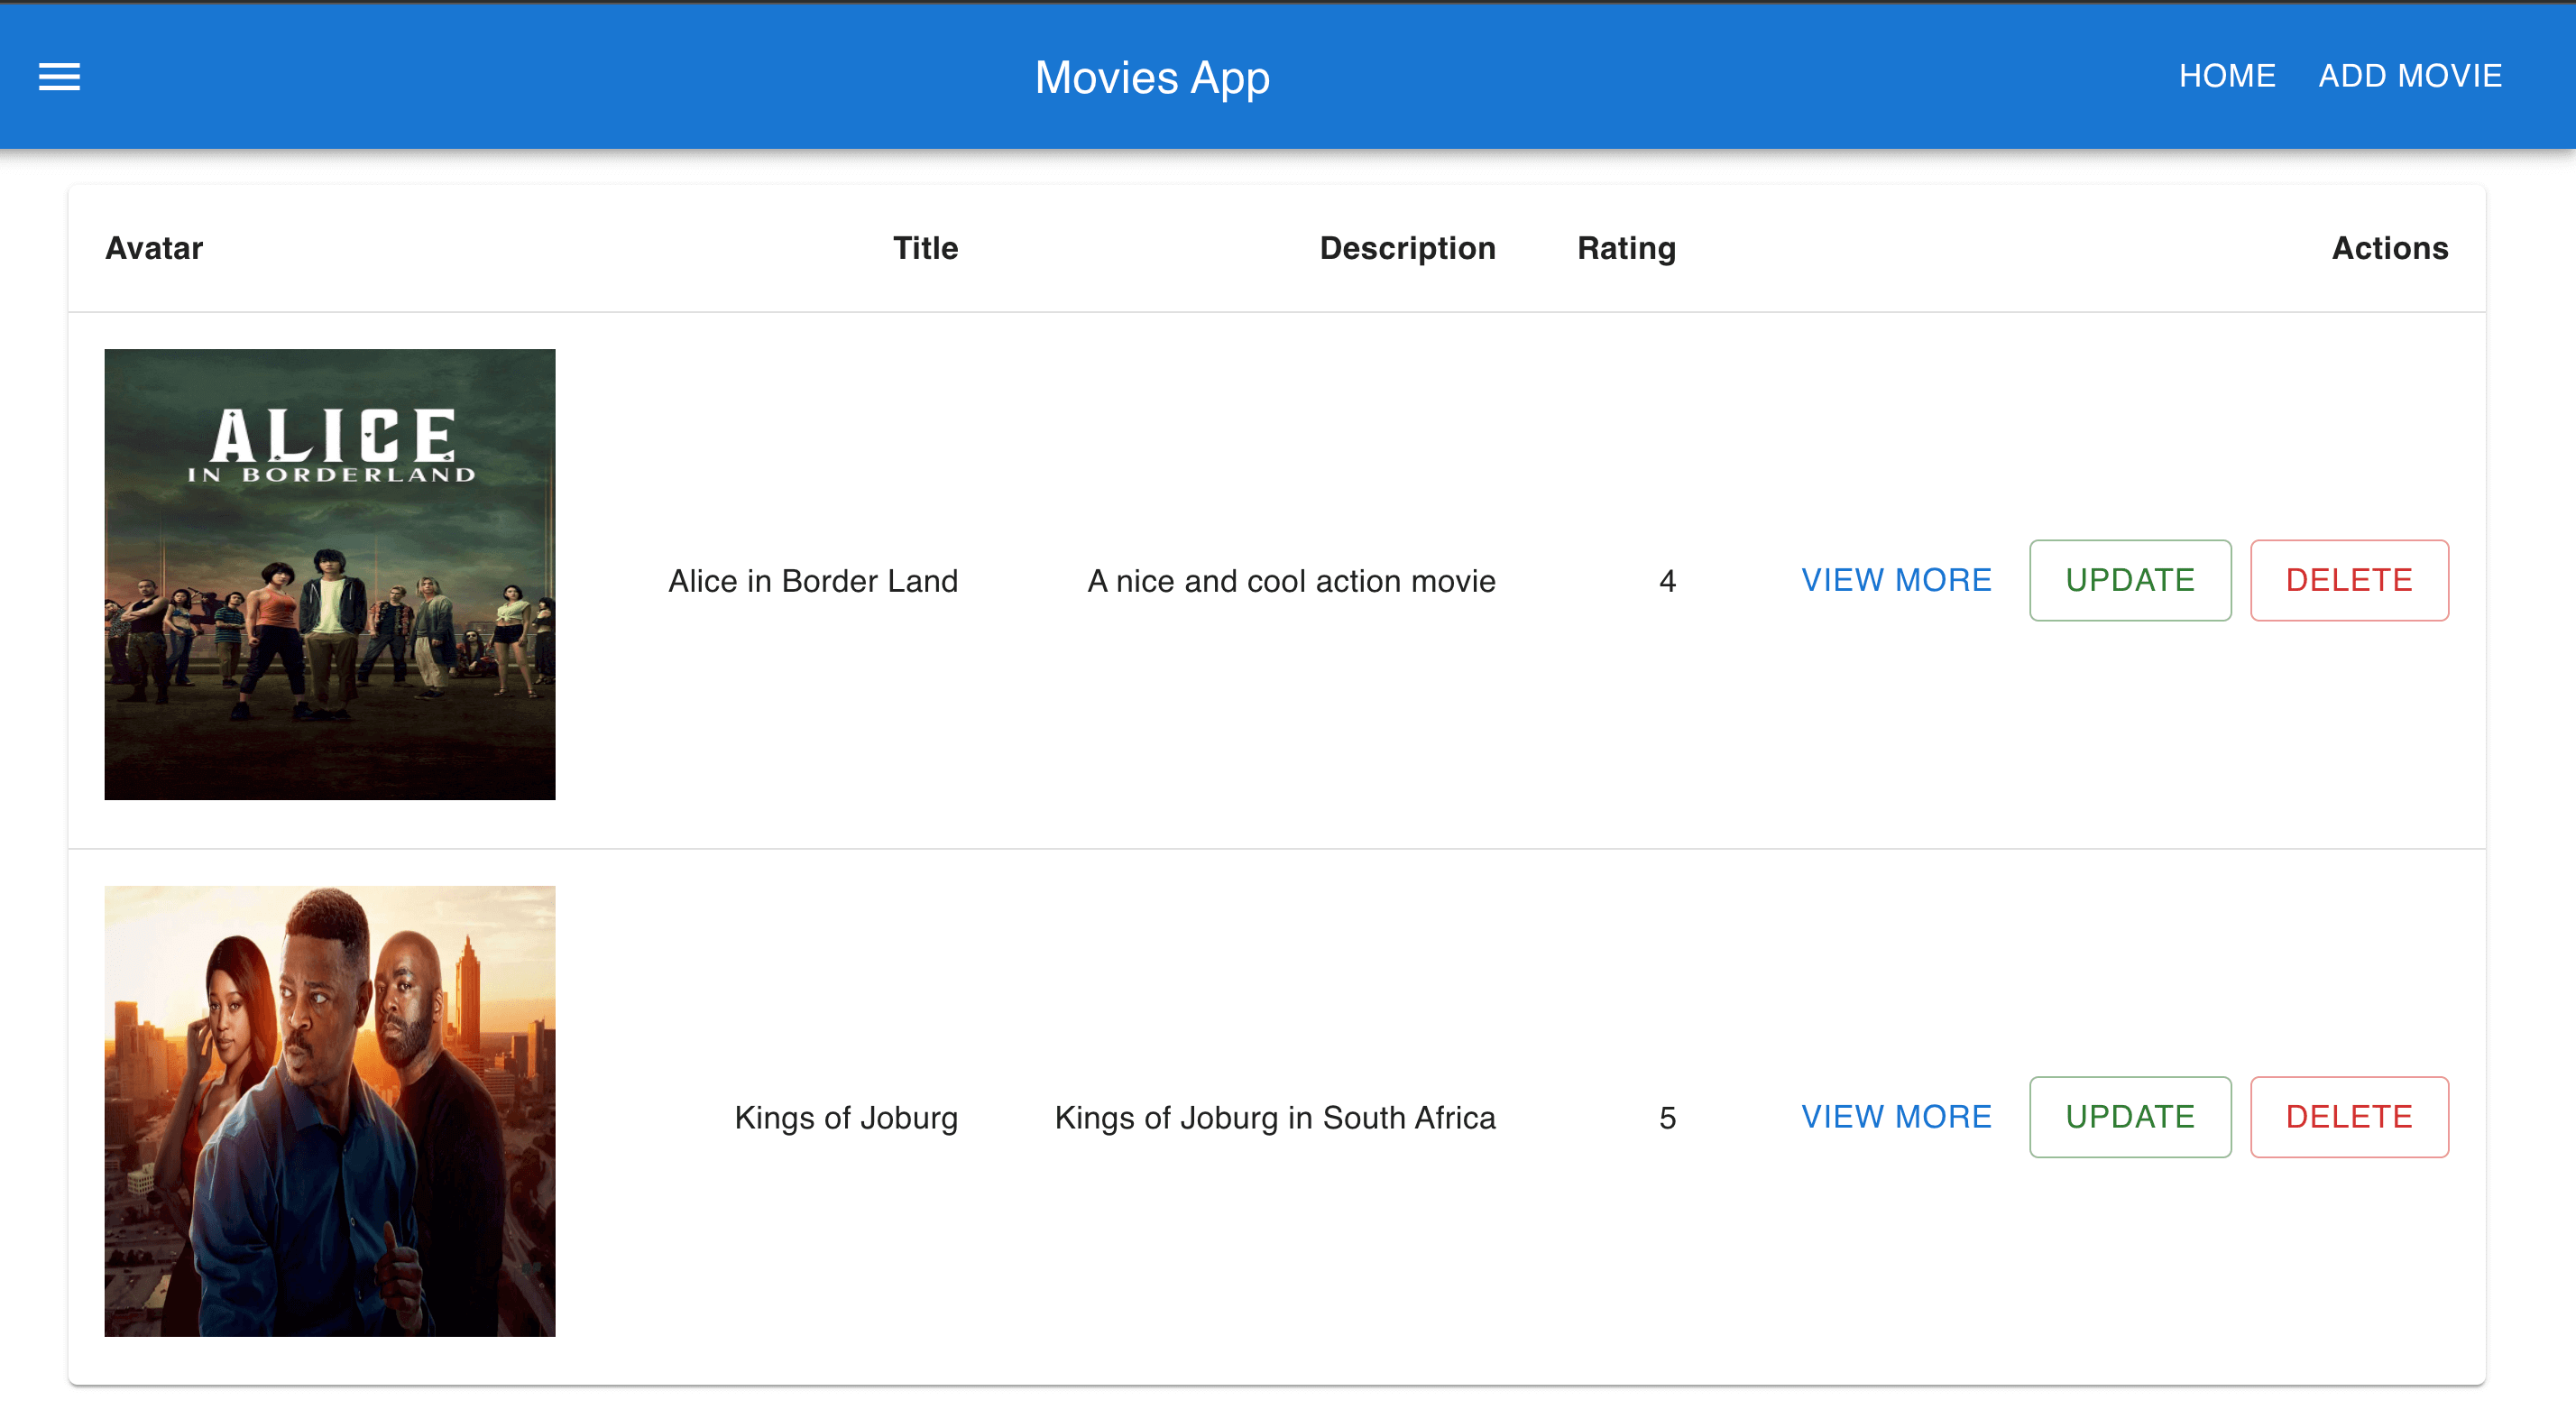
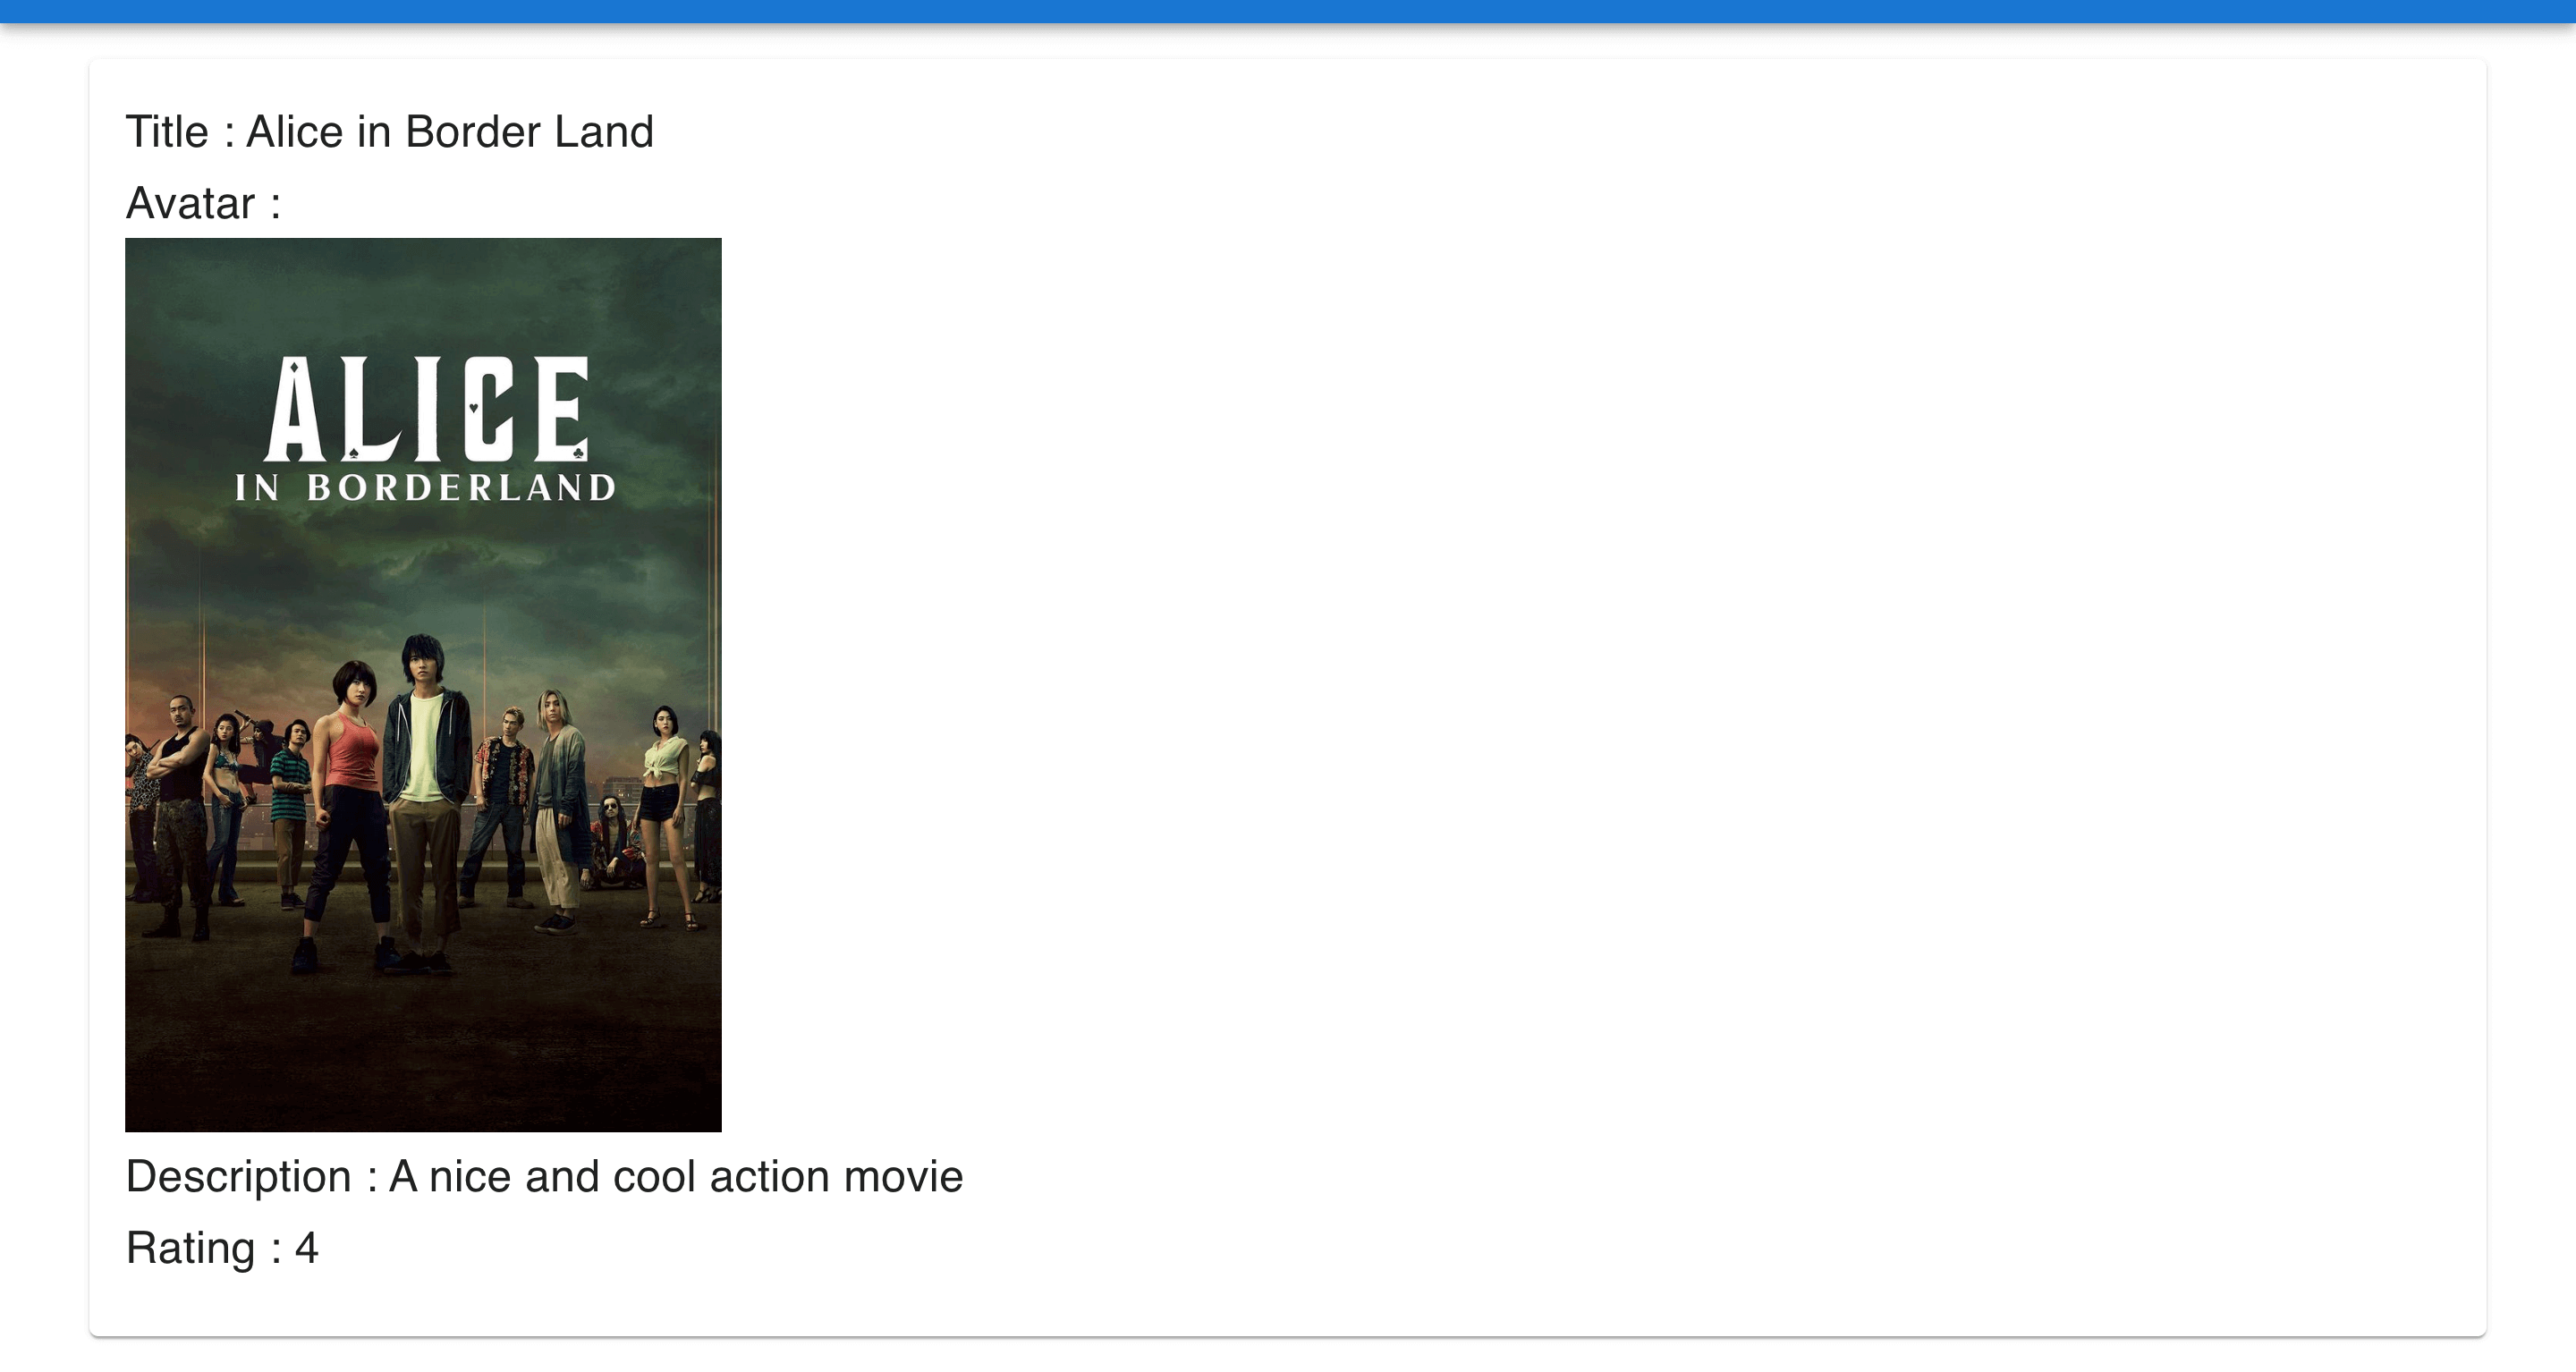
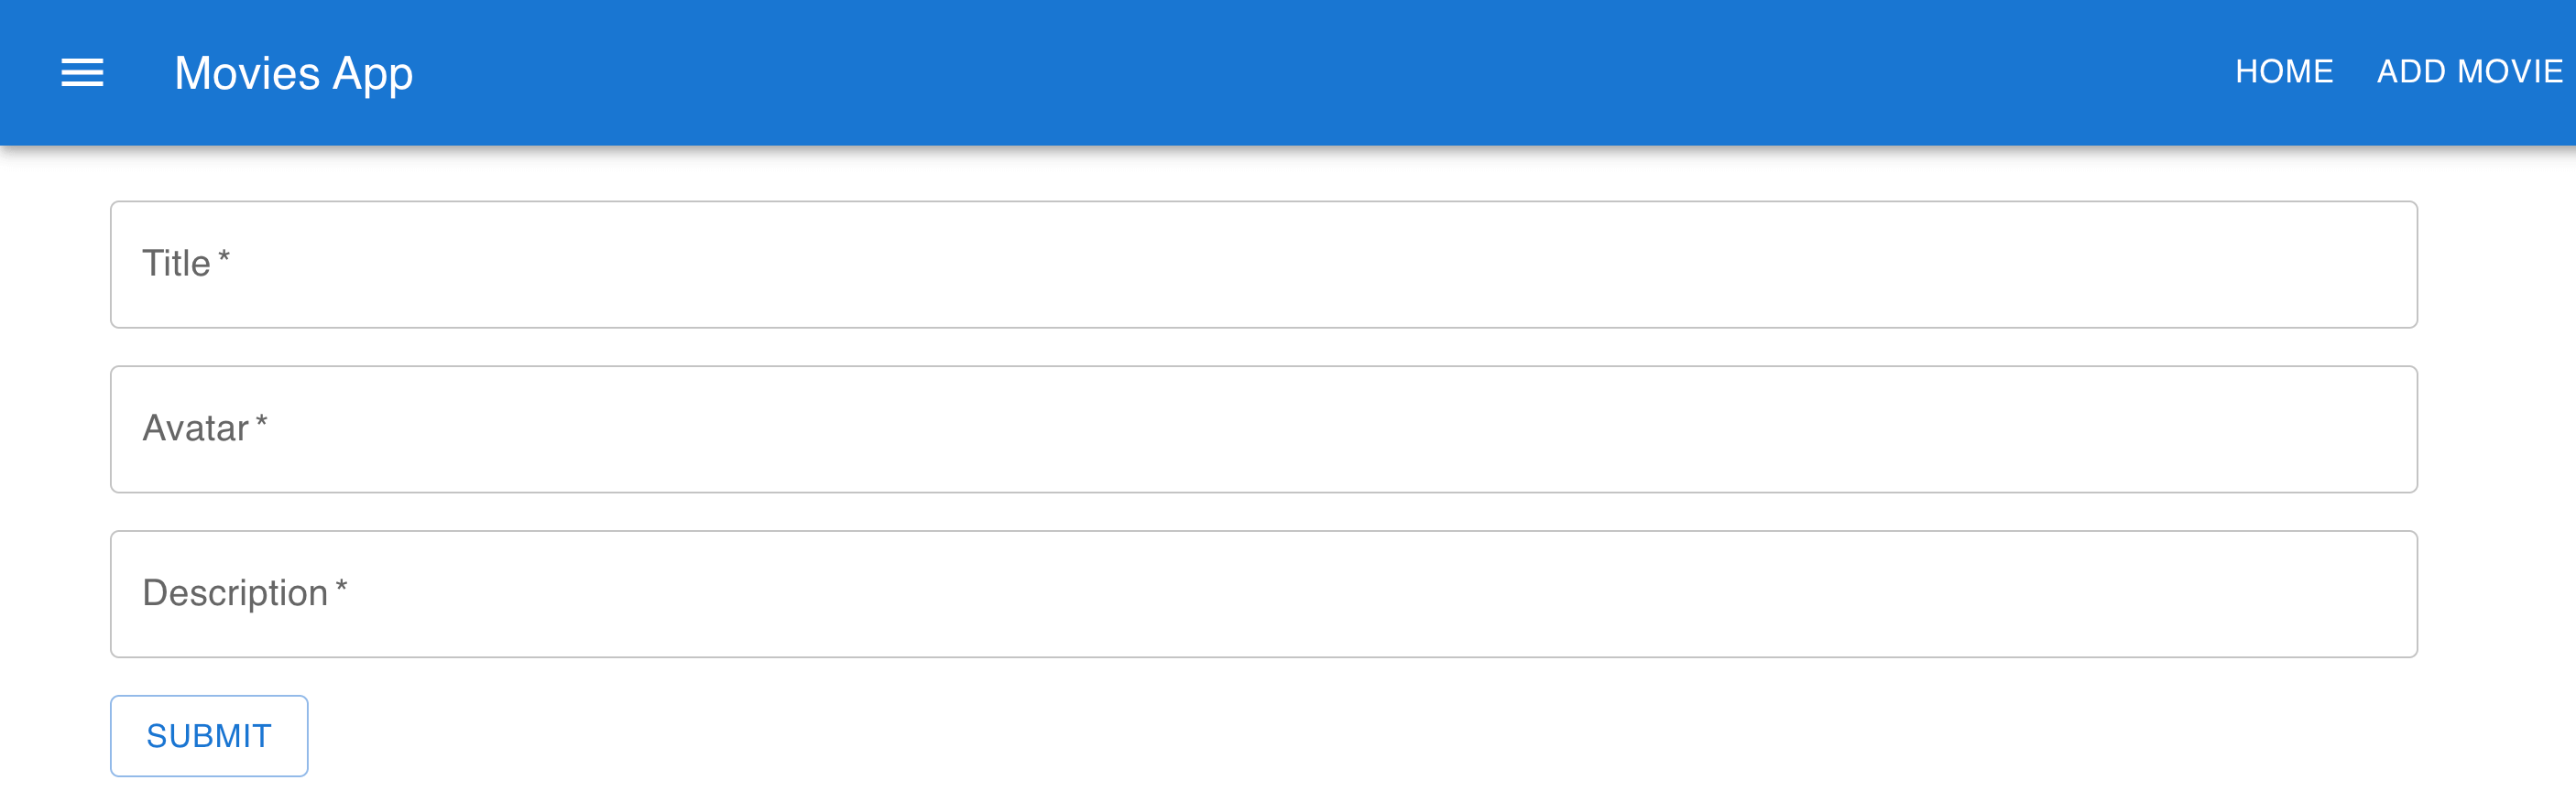
Access the application on http://localhost:3000/. Your pages should be displayed as:
- Home page: Fetches the movie
- View single movie page:
- The Add movie page:
- The Update movie page:
Now that you have mastered Creating Flask APIs with React apps, why not dive deeper and take your React skills to a new height? Learn How to Build and Implement Infinite Scroll in React Apps. Get crazier learning this Consuming GraphQL API with ReactJS Definitive guide.
Conclusion
This post shows you a high-level overview of integrating a Flask API with a React app. You have created a Flask server that exposes an API and a React app that send requests to the API using Axios. This communication allows you to build dynamic and interactive web applications.
Written By:
Abiola Isabella
More Related Articles:
-

How to Create reCAPTCHA V2 With Google Captcha and React
CAPTCHA (Completely Automated Public) is a challenge-response test used to determine whether or not a user is human or a bot. CAPTCHAs are used as a
Aug 23, 2023
-

Complete Guide to Material UI in Angular and JSON-Server
Material UI provides a huge collection of ready-made components such as buttons, toolbars, icons, inputs, etc. Material UI will make the development
Aug 5, 2023
-

Consuming GraphQL API with React.js
GraphQL is a query language that allows clients to request exactly the data they need and nothing more. This approach is more efficient than REST.
Jul 29, 2023
-

Guide to Creating CRUD APIs in Flask
Flask is a web framework for building web applications using Python. It is known for its lightweight and simple design. This makes it easy to get
Jul 28, 2023